SB-00043: sealing a spar you can't reach into
Quick catch-up for anyone who missed the last one: a few weeks back the elevator trim tab became the first part of this build to need FlameMaster CS3204, the two-part aerospace goop that everyone on the forums just calls "tank sealant." That was the friendly version of the job. The parts were open on the bench, I mixed a batch on a stick, striped it onto the flat mating faces, and cleco'd the skins down while it was still wet. You could watch every bit of it go where it was supposed to.
The elevator rear spar is the same material and the exact opposite job, and it's the reason I spent two evenings this week hunched over a syringe.
Why the spar gets sealed at all
The rear spar is the structural beam that runs the length of the elevator, and the elevator is the moving flap at the very back of the tail that points the nose up and down. For years Van's built that spar dry, just riveted aluminum. Then cracks started showing up in the field, spreading out from the rivet holes along the spar. Aluminum that flexes back and forth long enough eventually gives up, and a rivet hole is a stress riser that hands the crack a place to start.
The fix is Service Bulletin SB-00043, which Van's put out in September 2023. It adds a bead of tank sealant down the inside of the spar-to-skin joint. It isn't sealing against fuel or water; nothing wet ever gets near here. Van's word for what it's doing is vibration damping. A flexible rubbery layer bonded across the joint soaks up a little of the buzz every time the surface works, and takes the edge off the fatigue cycles the rivets would otherwise absorb on their own. My kit shipped after the bulletin, so the sealing steps were already baked into my instructions as rev. 1. Nothing to retrofit, nothing to drill out. I just had to do it.
Why you can't just butter it on
 [full size]
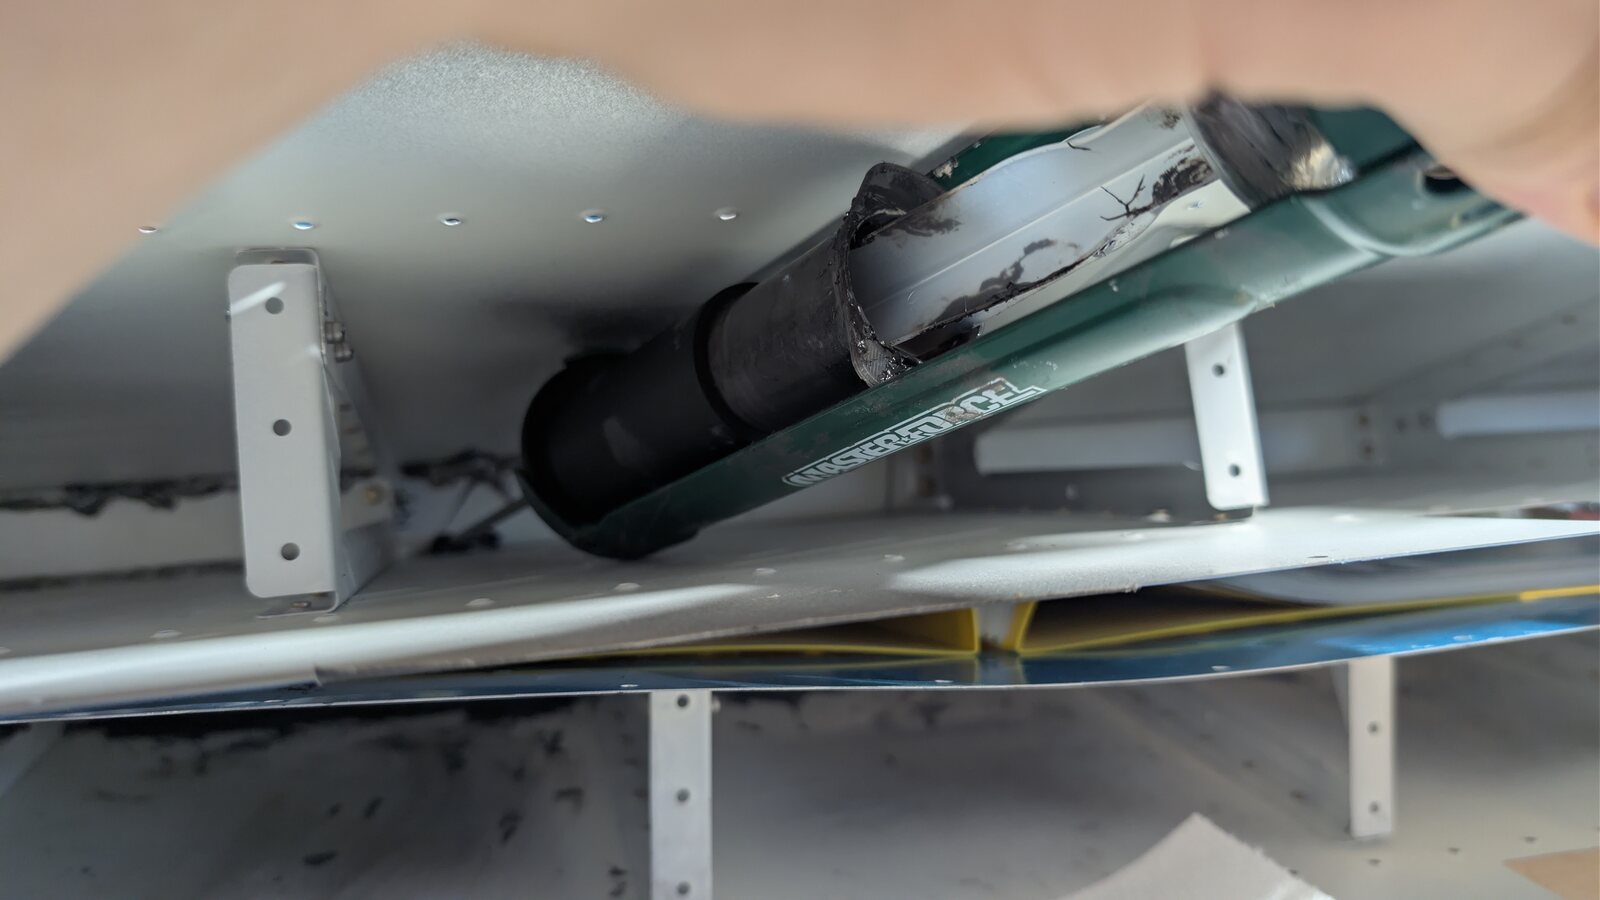
Here's the problem in one picture. The spar is a C-section, and the open mouth of the C faces aft, toward the trailing edge. The joint I need to butter is the back wall of that C and the skins that wrap onto its flanges, and it sits about eight inches deep in a slot that starts at three and a half inches of clearance at the mouth and closes down to maybe an inch and a half at the bottom. There is no combination of a mixing stick and a gloved hand that reaches down there. Whatever puts the sealant on has to be long, thin, and stiff, and it has to do it from the mouth.
The rig
 [full size]
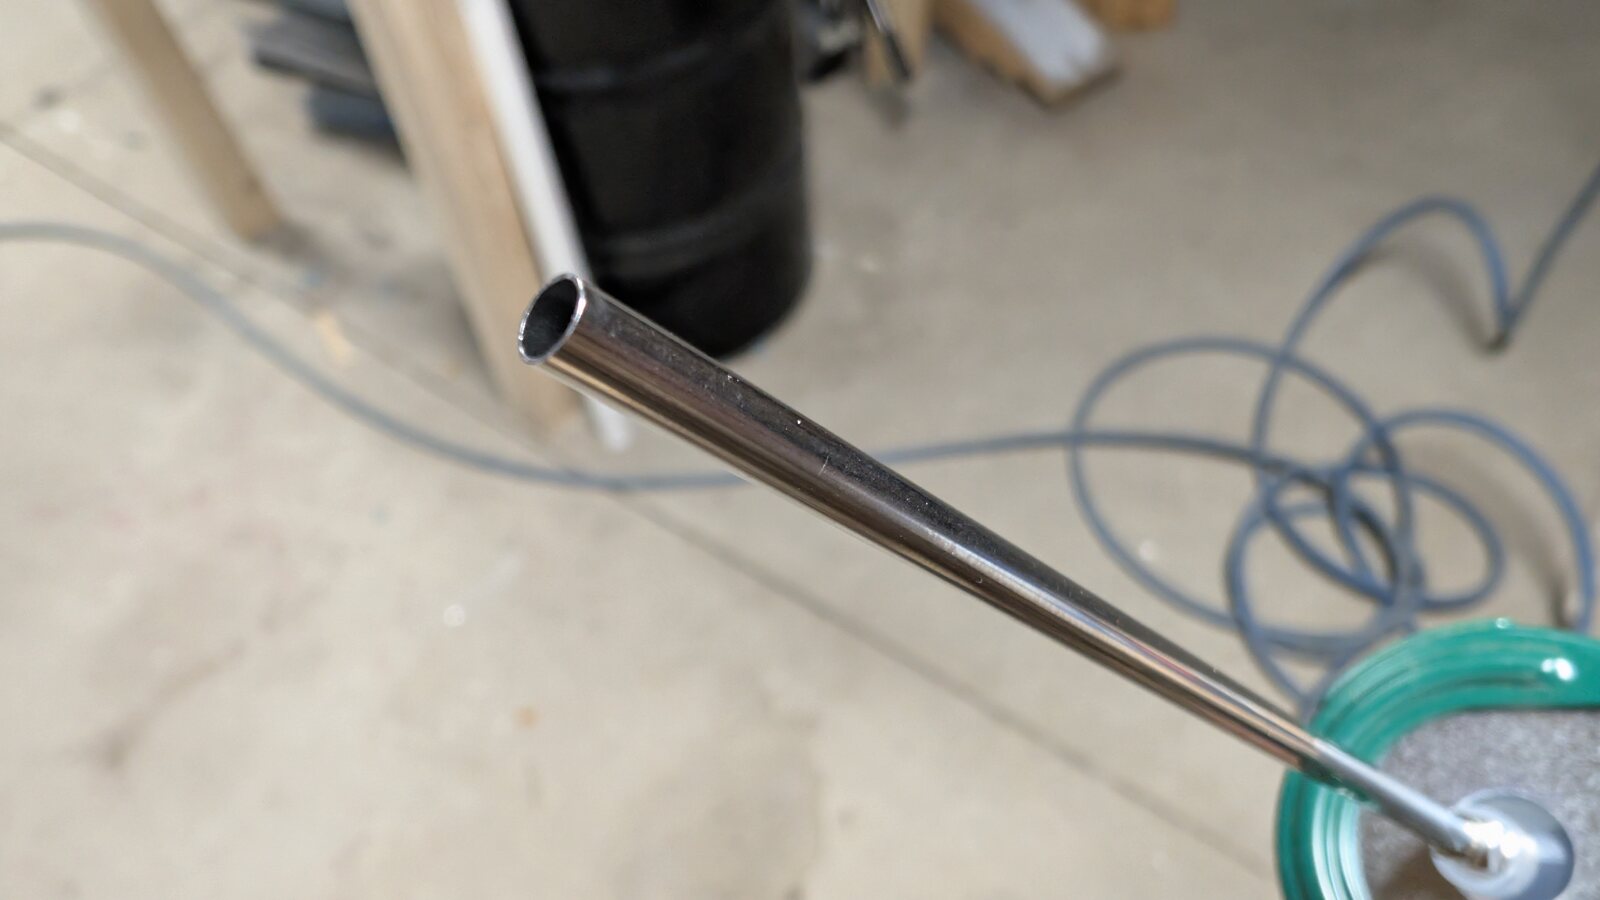
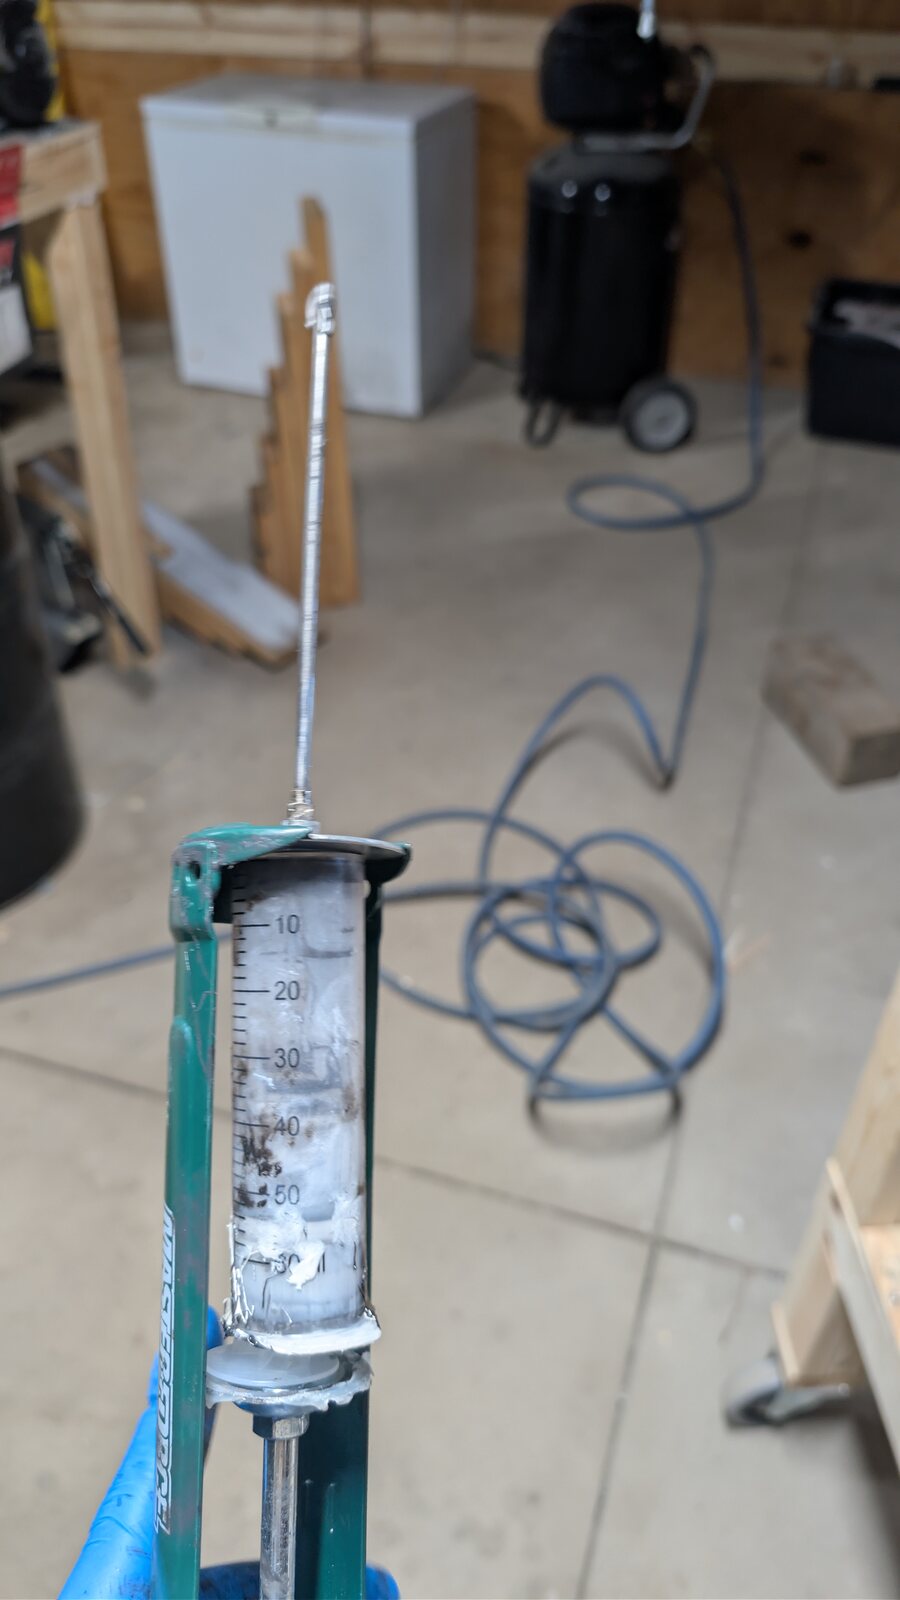
That's the whole applicator: a generic 60 cc Luer-lock syringe with an 8-gauge blunt dispensing tip threaded onto the nose. "8-gauge" is about the fattest needle anyone makes, roughly 4.3 mm of bore, and "blunt" means it's cut off square instead of pointed, because the goal is to lay a bead, not vaccinate the spar. The tip is five inches long, which is enough, stacked on top of the syringe body, to touch the bottom of the slot.
None of it is precious. The syringes come off Amazon at $1.52 apiece and I treat them as single-use. The stainless tip costs about twice what the syringe does, which is the whole reason it's worth cleaning instead of tossing. Add a few spare tips and the entire "applicator" came to under thirty dollars, most of which is still sitting in a drawer.
 [full size]
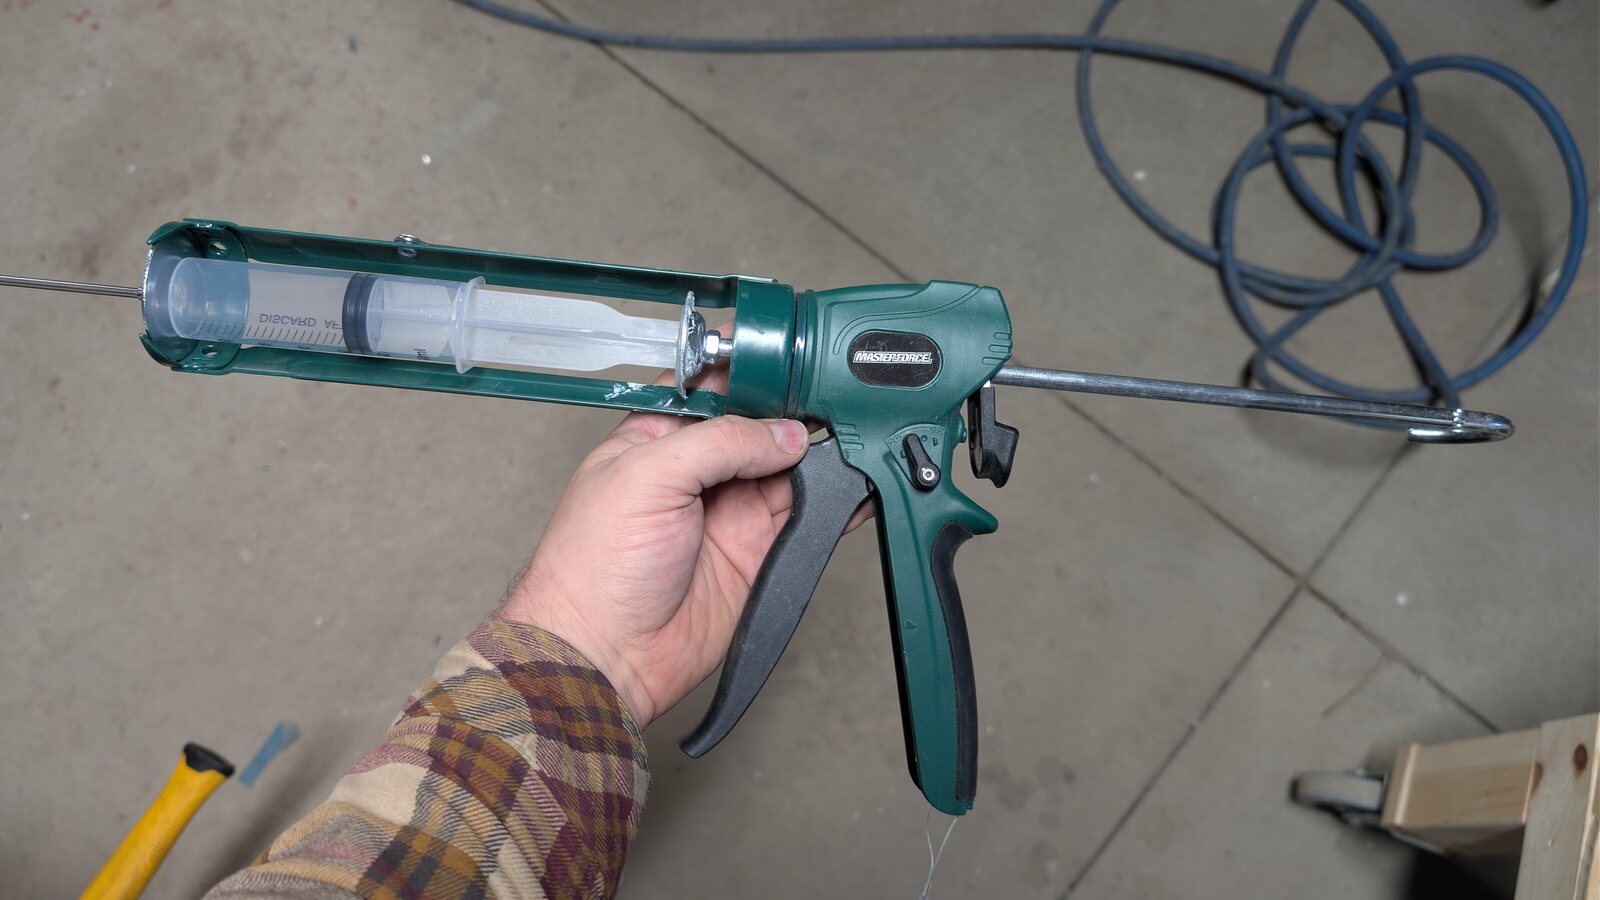
Driving the syringe is a $22 two-speed caulk gun from Menards that I already owned for squirting RTV silicone around the house. The two "speeds" are really two thrust ratios, a low gear for shoving thick stuff and a high gear for going fast once it's moving. It's a completely unremarkable tool and it's the correct one, because fresh tank sealant doesn't so much flow as grudgingly relocate. Pushing it through that 8-gauge bore by hand feels like extruding bread dough, and my honest rate was around 0.6 cc per second. Worth noting where that resistance actually lives: it's the plunger fighting friction in the barrel, not the needle choking the flow. The Luer fitting itself is one of the stouter parts of the whole stack.
The one part I had to print
 [full size]
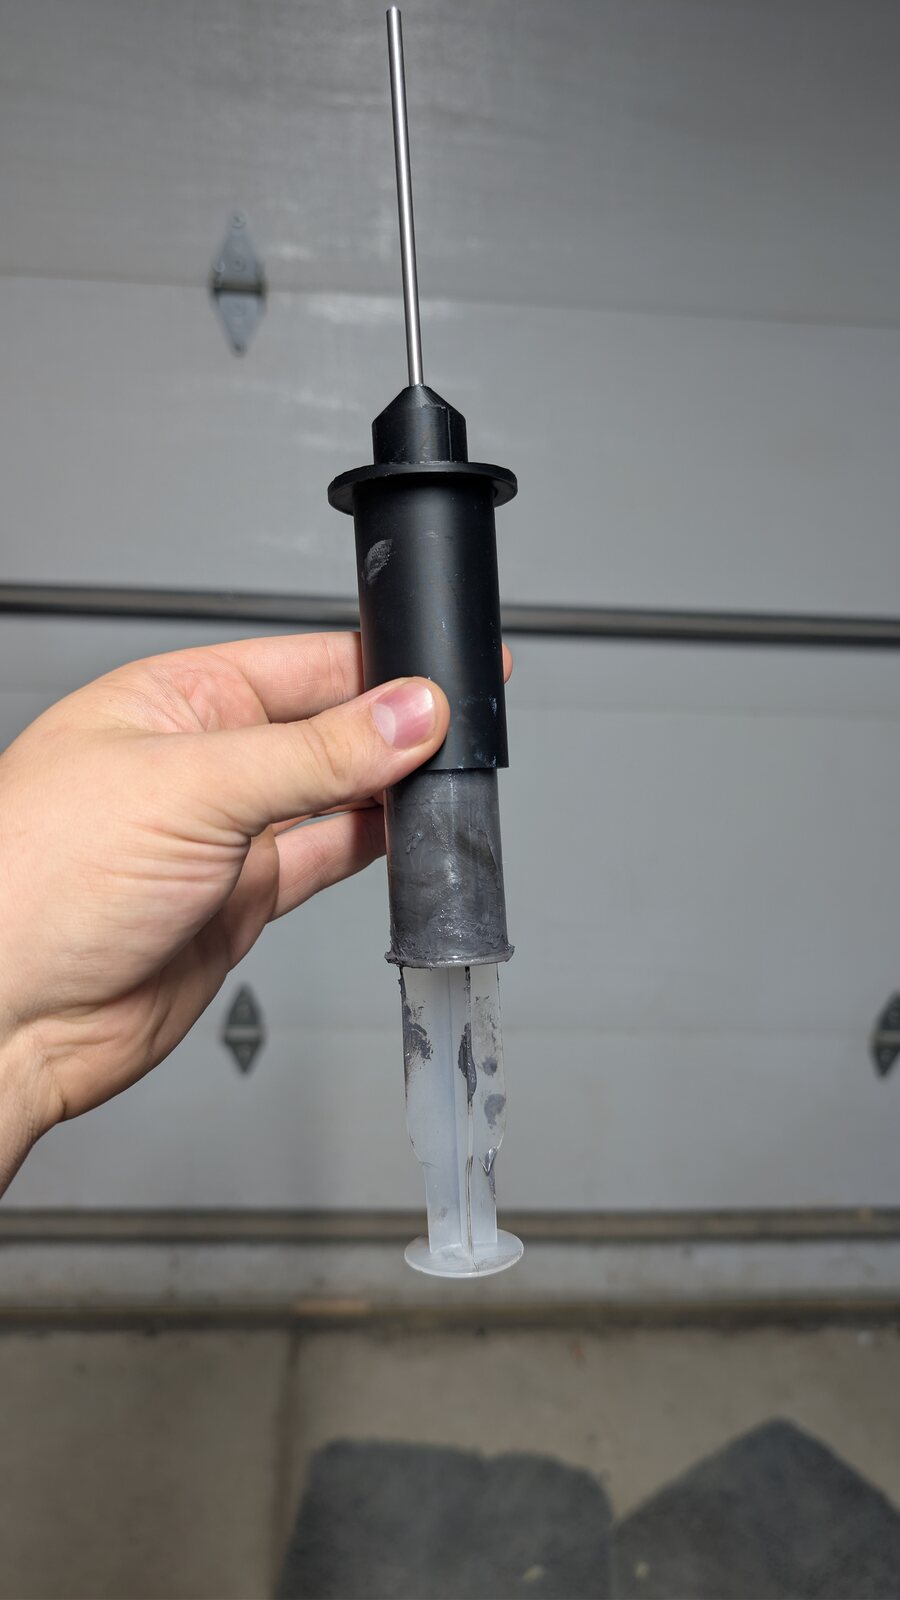
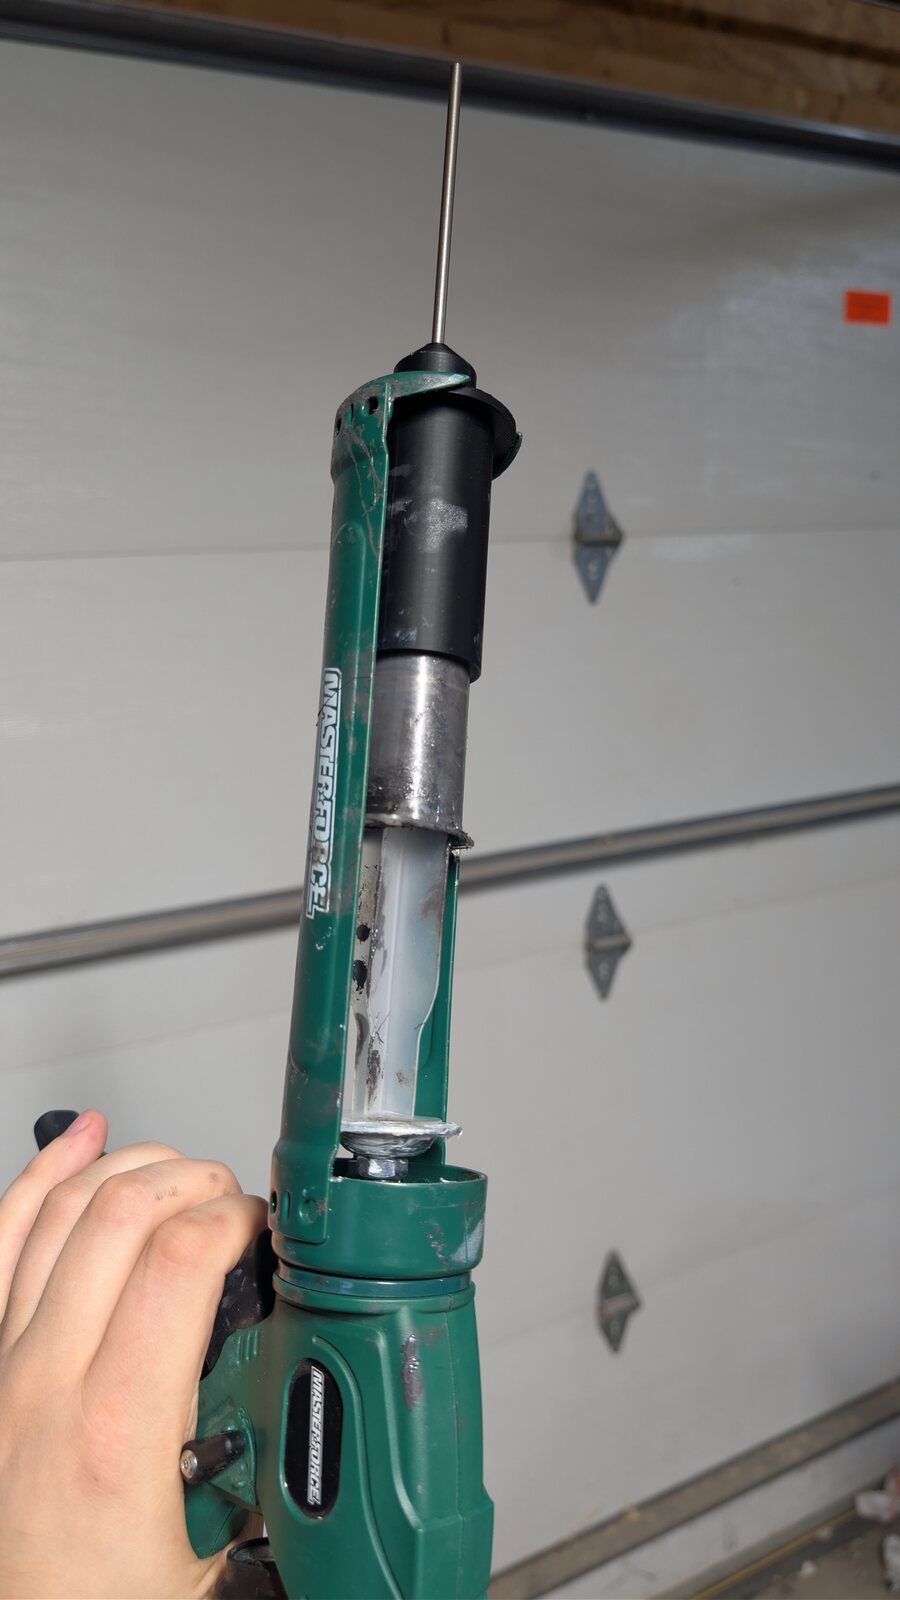
Two problems turned up the first evening. One: a skinny 60 cc syringe doesn't sit straight in a cradle built for a fat caulk tube, so it cants over sideways under load. Two, and worse: a five-inch tip is a five-inch lever. A small sideways nudge at the far end of it turns into a real twisting load right at the Luer thread, and I didn't love how that felt down in the slot.
My first answer to problem one was a washer, shimming the syringe up straight in the cradle. It worked, and it did nothing at all for problem two. So I opened FreeCAD and drew a sleeve from scratch: a plain tube that slides over the top of an assembled syringe, snug on the barrel and up over the collar where the tip screws on. It doesn't clip, latch, or thread onto anything. It just wraps the weak spot in a stiff collar so the bending load has somewhere to go besides the threads, and it seats the syringe dead straight in the gun while it's at it, so the washer got to retire.
 [full size]
It's printed in plain PLA. Not PLA+, not anything clever, just the cheapest spool on the shelf, and it has shrugged off every solvent that's landed on it so far. Ten minutes to draw, slice, and send to the printer, printed once, no revisions, which almost never happens to me. It costs a few cents of plastic, and because it only ever touches the clean outside of the syringe it doesn't even get dirty; I peel it off and keep it. The file is going up on Thingiverse for anyone else staring down this bulletin.
Working the clock
 [full size]
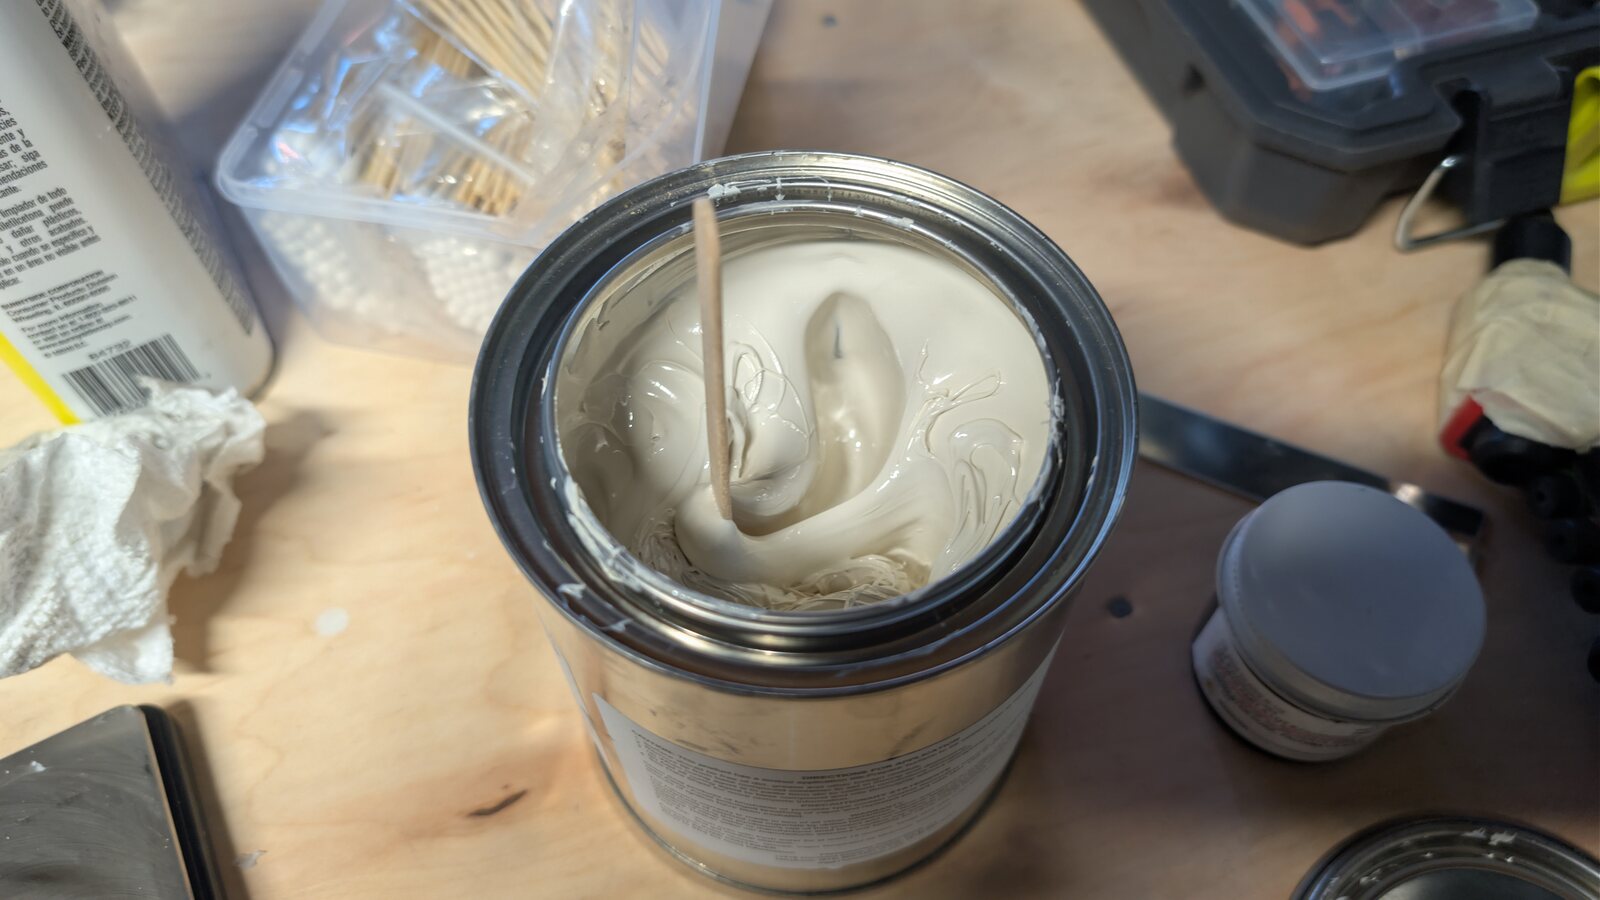
CS3204 is a two-part system, and this is the setup for weighing it out: a cream-colored base and a dark curing agent, combined at roughly ten parts base to one part agent by weight. You can measure both parts into a cup and let them sit next to each other all evening and nothing happens. The thirty-minute working clock only starts when you start stirring, and from that moment you've got half an hour to get every bit of it onto the part before it stiffens and quits sticking.
That one fact drives all the rest. Mix a small batch, about 25 cc, because that's roughly as much as I can actually place before whatever's left in the cup sets into a brick. Stir it until it's one flat, even color with no marbled streaks running through it; you can't over-mix the stuff, but you're spending clock the entire time you try. Then load the syringe, push the sleeve on, drop it in the gun, and go. The elevator took about 120 cc across five or so batches.
 [full size]
If you flip between my photos you'll notice one batch came out nearly black and a later one is a much lighter grey. That worried me the first time it happened, so to save you the same worry: it's only mix ratio. Anywhere from about nine-to-one to eleven-to-one is fine, and the curing agent carries almost all the pigment, so a little extra agent tints the whole batch dramatically darker. It doesn't change the cure and it doesn't change the strength. Darker is just darker.
The bead, and where I went my own way
The bulletin asks for a 3/8-inch bead, a 9.5 mm rope of sealant run down the joint. I didn't do that. I ran a distinctly thinner bead and moved the tip more slowly, which lets the sealant settle down into the corner and wet both faces properly instead of arching over the gap as one fat sausage that's only half in contact. By the time I'd covered the same run of joint I had the same footprint of sealant down, better filled, using less material. I'm satisfied a well-wetted thin fillet does the damping job at least as well as an underfed fat one, but it's a step away from the letter of the bulletin, so I'm putting it in writing here.
Aiming, at least, is not the hard part. The joint is eight inches down but it's a straight shot from the mouth, so it's just eyeballed under the shop lights, no fancy lighting. The sealant is tacky enough and thick enough that it stays exactly where the tip leaves it. You could genuinely do this upside down.
The one thing that isn't negotiable: every rivet in that spar goes in before any sealant gets mixed. The sealant is the last step, a fillet laid into a structure that's already finished and already riveted solid. Sealant anywhere near a cleco is a small tragedy. Once a section's done I give it about 12 hours before I touch it again.
Can you check it?
Mostly, no. Once the bead is down in the corner of a closed C-section eight inches deep, there's no clean way to confirm it's continuous. You can put a light on one side and hunt for it glowing through on the other, but that's a weak test and I wouldn't lean on it. This is where it helps to remember what the sealant is and isn't. It's a damper on a joint that is already fully fastened and structurally complete without it. It is not primary structure. A slightly imperfect bead still damps.
Cleanup, and the one thing I'd change
 [full size]
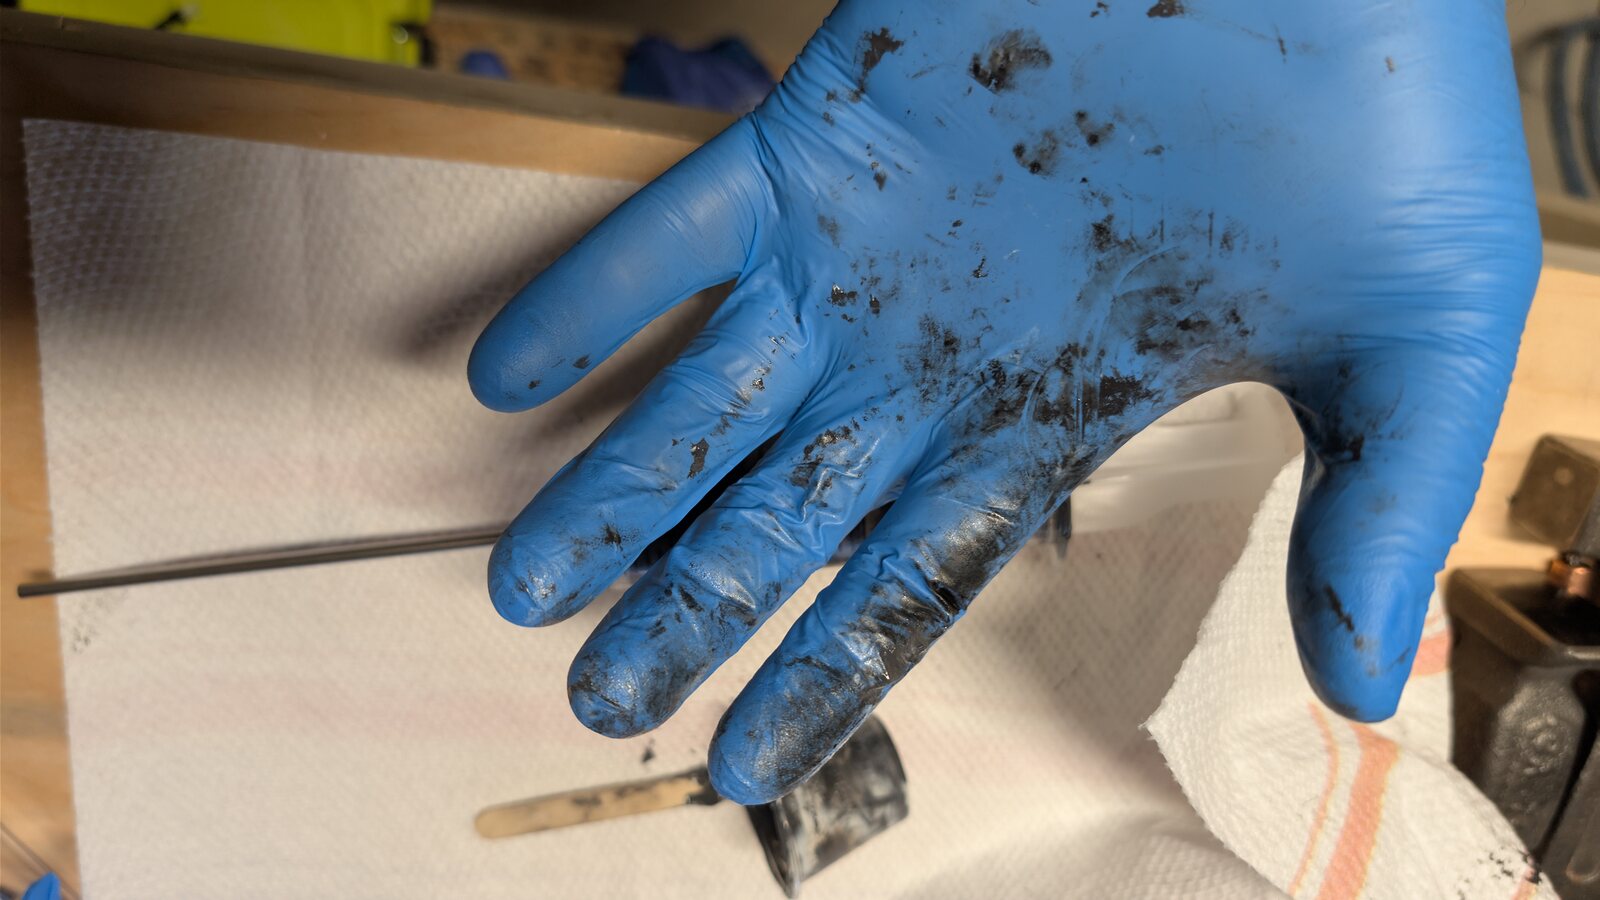
This is still the messiest material I've ever worked with, and the disposal plan is just economics. The $1.52 syringe goes straight in the trash. The pricier stainless tip is worth the three minutes it takes to flush with solvent. The printed sleeve never gets dirty, so it goes back in the drawer. Everything else, the cups, sticks, gloves, and a truly stupid quantity of paper towels, is now garbage. A friend of mine sums FlameMaster up well: everything it touches either becomes trash or becomes an airplane.
The rig itself I wouldn't change a thing about. Next time I've got a sealant job crammed into a space I can't get a hand into, this is exactly what I'll reach for. The only thing I'd do differently is the prep: more paper down, tools staged tighter, work area kept genuinely clean, because scraping cured sealant off things I never meant to seal is going to cost me more time later than a drop cloth would have cost me now.
Next up is finishing the rest of the elevator and hanging it on the stabilizer, which finally closes the book on the tail.