Tank sealant: what it is, and why my trim tab needed it
Quick catch-up for anyone who missed the CherryMAX saga: the tail is still the frontier, and I'm back on the elevator trim tab (the small hinged strip on the trailing edge of the elevator that lets you dial stick pressure out in cruise, instead of holding forward or back pressure on the yoke for the whole flight). Between that post and this one there wasn't much worth writing up on its own: a full round of cutting, grinding, deburring, mock assembly, mock disassembly, scuffing, and priming, which is the unglamorous middle stretch every part in this kit goes through. But the trim tab just became the first part in the entire build to need something new: a two-part aerospace goop that everyone on the builder forums just calls "tank sealant."
 [full size]
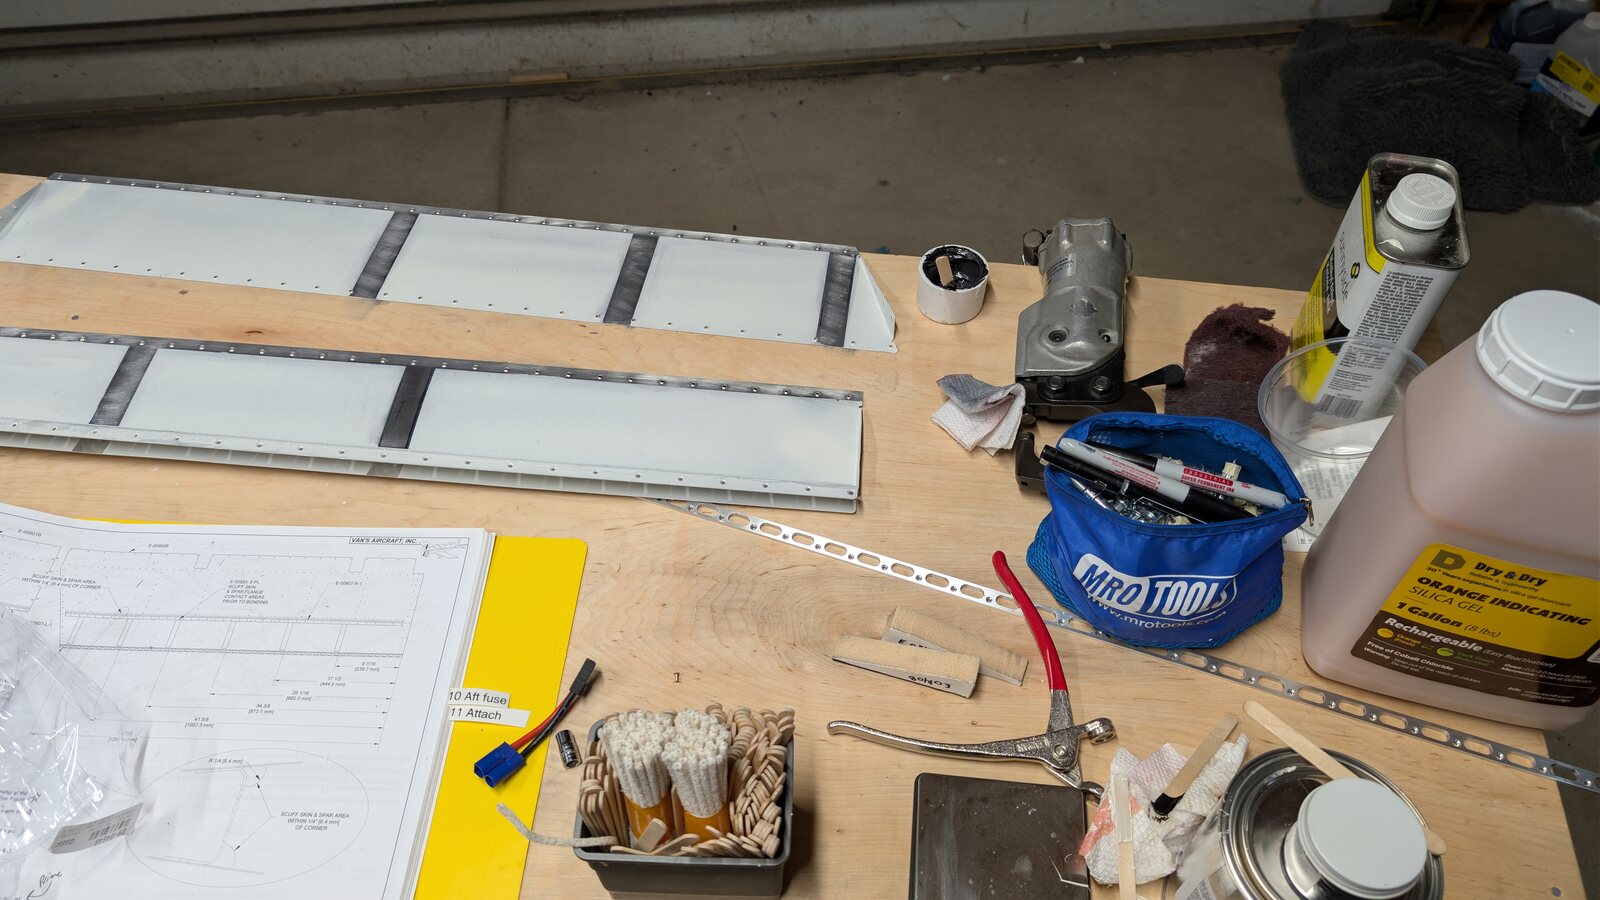
Here's the staging area from the night I mixed it. Primed trim tab skins on the left, cleco pliers and foam inserts in the middle, a jug of desiccant and a spare quart of primer off to the side, and a little zippered tool bag full of mixing sticks and permanent markers. Everything laid out ahead of time, on purpose, because once this stuff is mixed you do not get to go wandering off to find a tool.
What's actually in the can
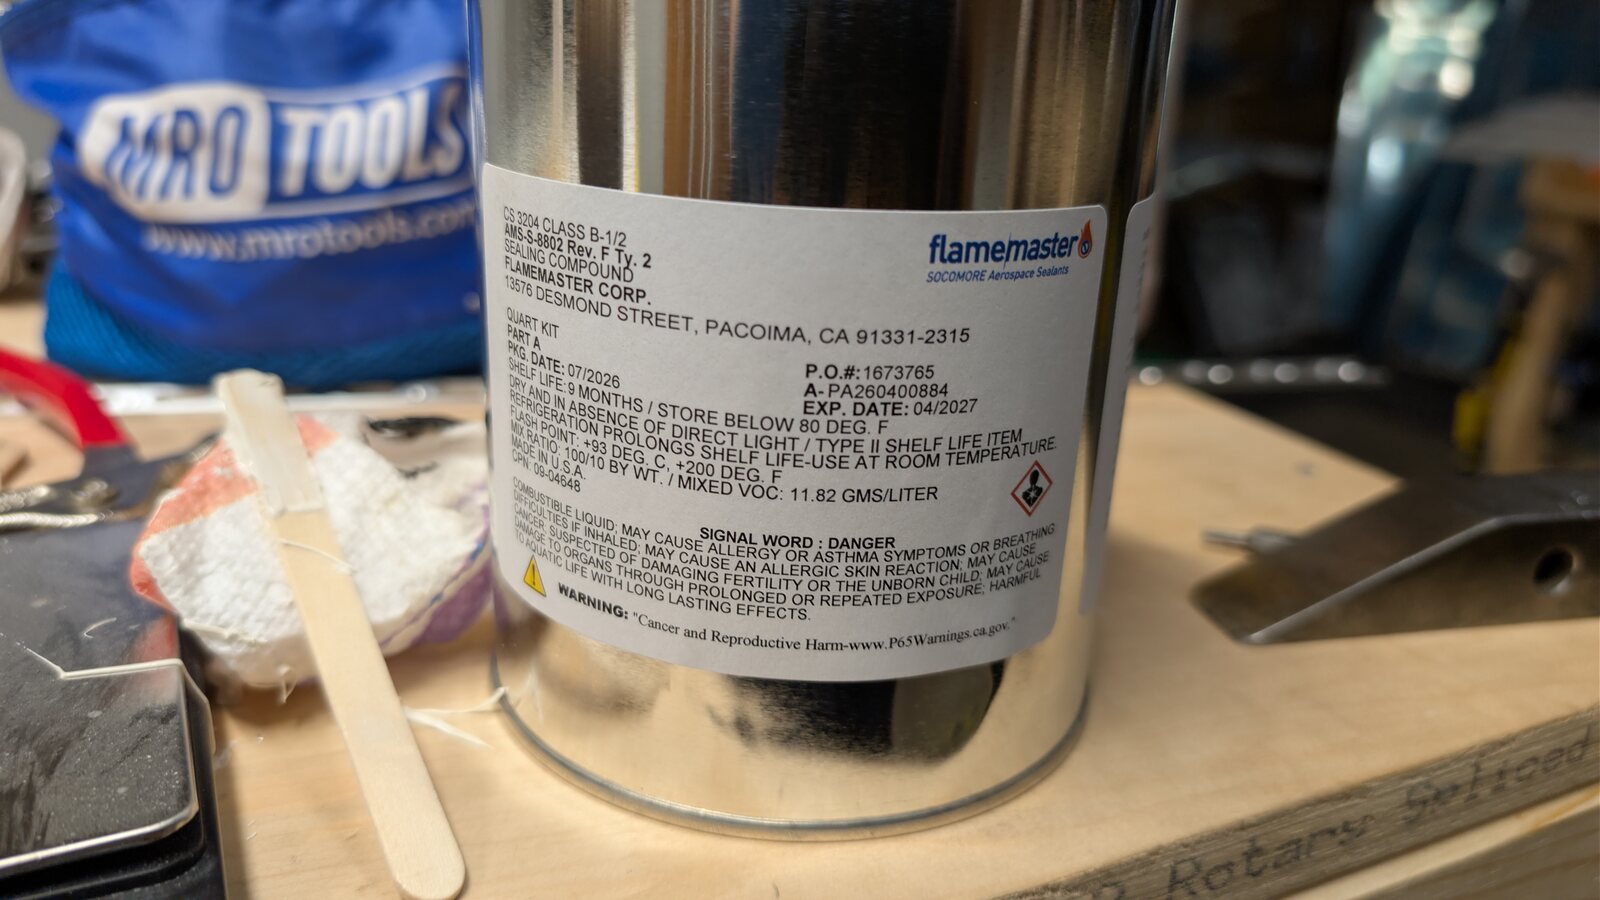
The kit is Flamemaster CS3204, Class B-1/2, conforming to spec AMS-S-8802 Rev F Type 2. It ships as a two-part quart kit: Part A is the base compound, Part B is the curing agent, and you mix them 100 parts to 10 parts by weight right before use. This was my first time touching the stuff. I'd heard the rumors on the forums about how nasty it is to work with, so I ordered the largest quantity Aircraft Spruce sells it in: one quart kit, $168.
 [full size]
That's Part A's label: packaging date, nine-month shelf life, "store below 80°F," refrigeration recommended to stretch that further, flash point, VOC content, and a full Prop 65 warning about cancer and reproductive harm. Every can is basically a dated, lot-numbered lab batch rather than a shelf product.
 [full size]
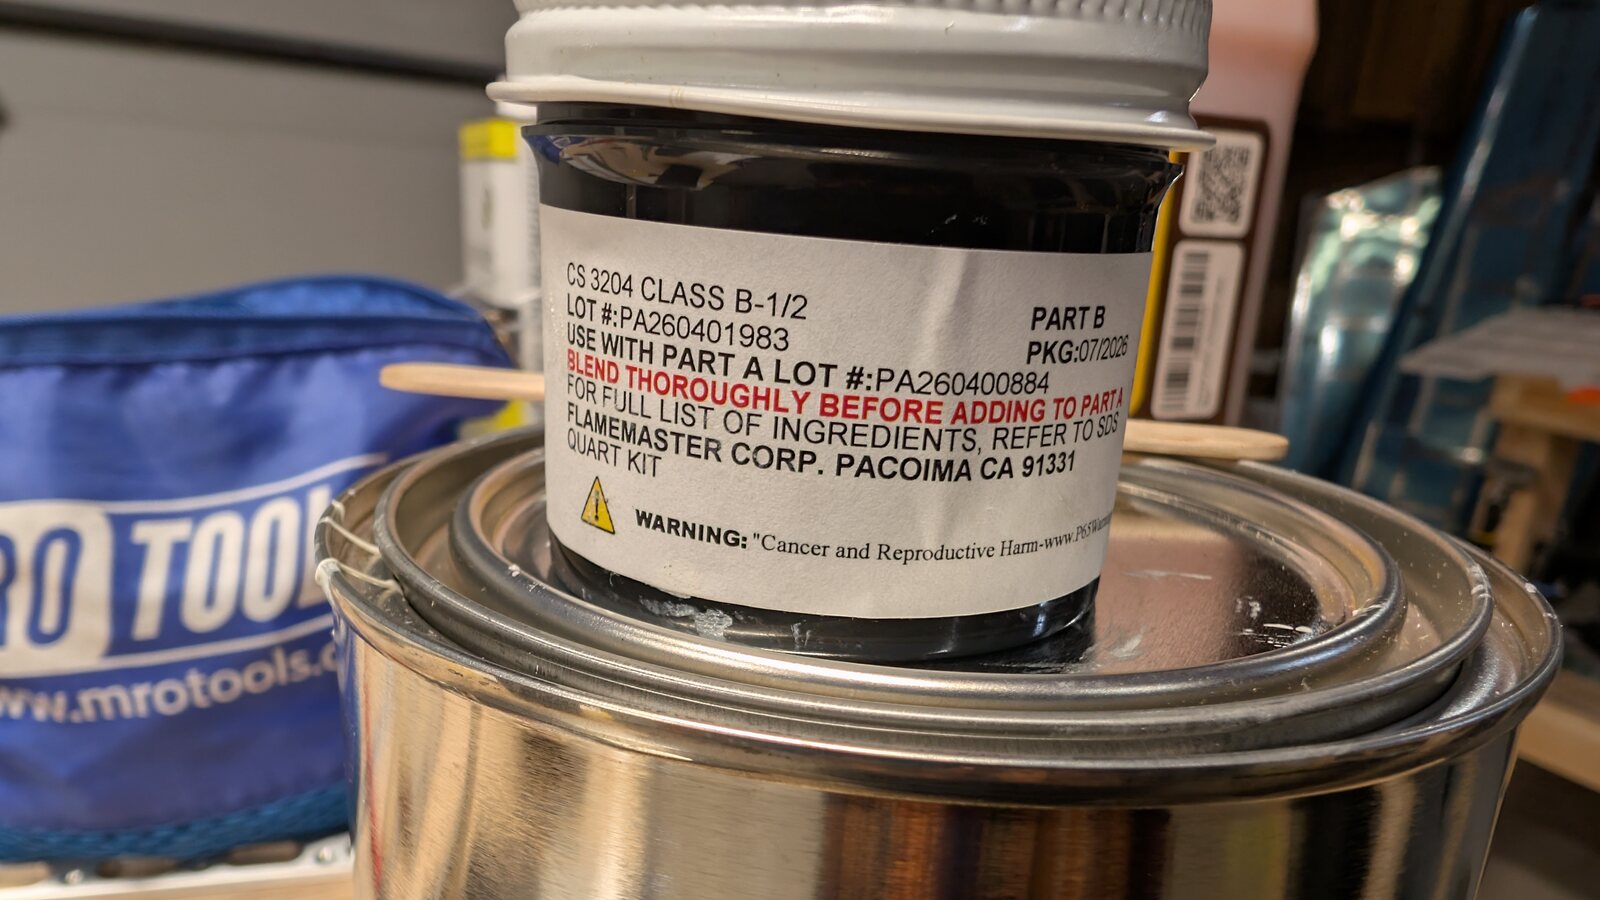
And Part B, the curing agent, with the line that matters most printed in red: "BLEND THOROUGHLY BEFORE ADDING TO PART A." Get that wrong and you don't get a bad seal, you get a seal that never actually finishes curing.
Why "tank" sealant, and not silicone or JB Weld
 [full size]
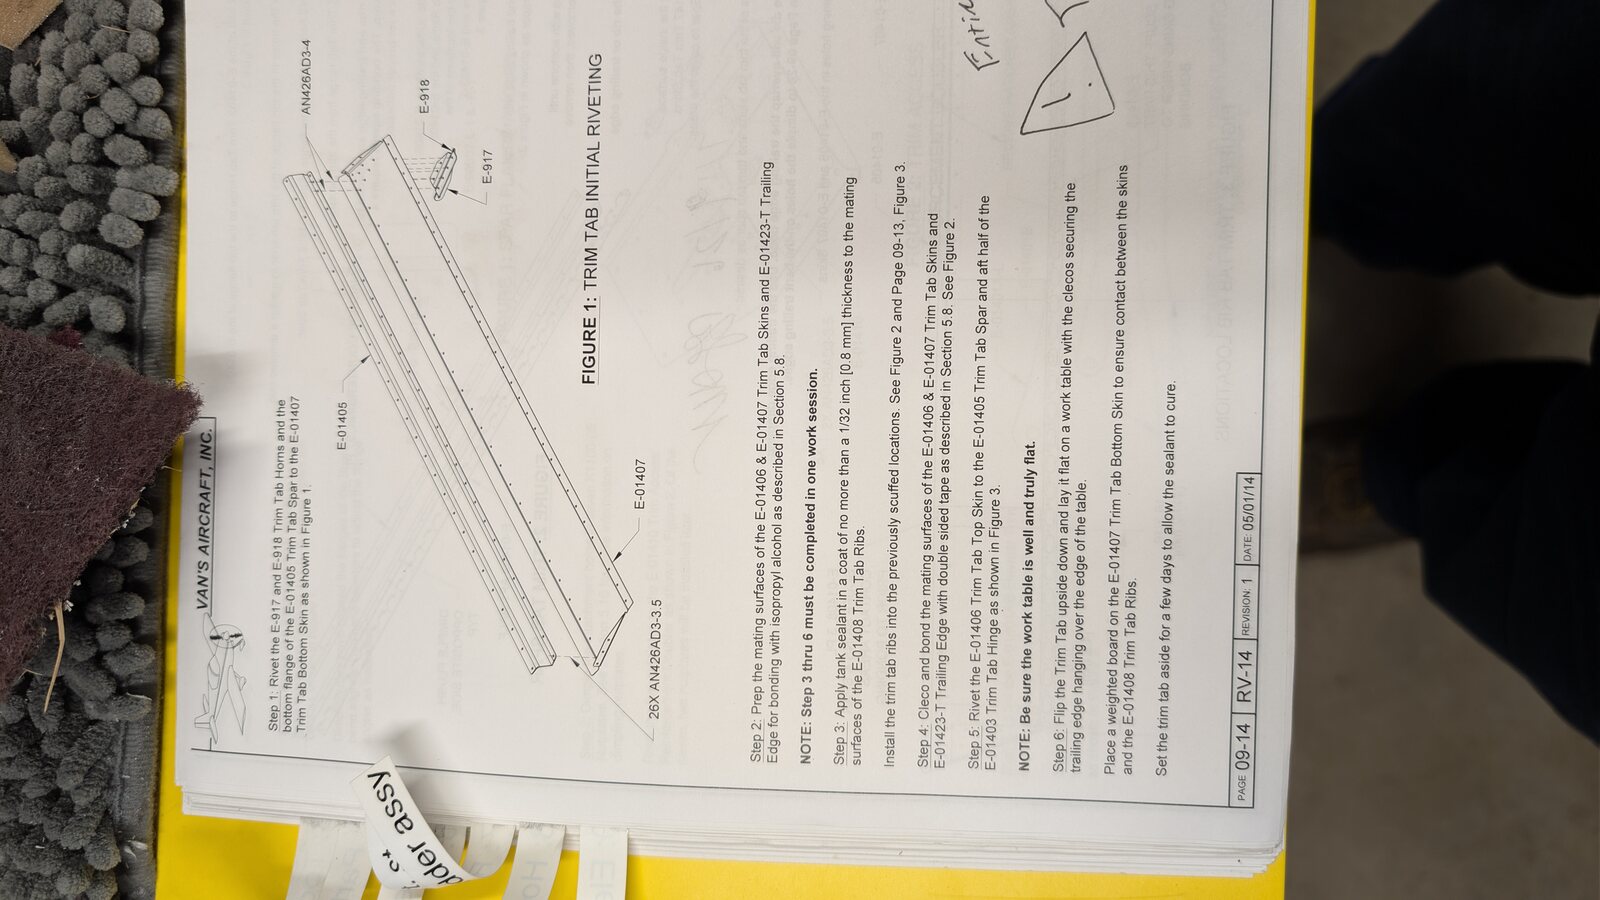
That's the actual instruction page, Figure 1 in the manual, page 09-14. Step 2 says to prep the mating surfaces of the trim tab skins and ribs with isopropyl alcohol on the previously scuffed areas. Step 3 says to apply tank sealant in a coat no more than 1/32 inch thick, then cleco and bond the parts together before riveting. It's not sealing anything against fuel here; the trim tab never sees avgas. What it's actually doing is called a faying surface seal: filling the microscopic gap between two riveted aluminum layers so moisture can never wick in between them and start crevice corrosion, and so the two skins can't work against each other under vibration over the next few decades. The rivets provide the clamping force. The sealant is what keeps the joint from quietly rotting from the inside where you'd never see it.
This is technically an experimental deviation if you skip it - you could bed this joint in an RTV silicone instead, and some builders have. But RTV isn't approved for structural aircraft use no matter how many decades of good service it's put in holding your windowsills shut, and under sustained vibration a silicone bead in a load path like this is expected to fail within a few hundred flight hours. CS3204 is qualified for a service life in the 10,000+ hour range. The other obvious substitute, JB Weld, fails for a different reason: it's a rigid epoxy putty, great for gluing things that never move relative to each other, but an airframe flexes constantly, and a hard epoxy bond will eventually crack and pop the seam open instead of absorbing that movement. Tank sealant is neither of those things. It stays a rubber.
Mixing it
Mixing went smoothly, but only because I was careful. This particular B-1/2 formulation gives you about thirty minutes once Part A and Part B are combined before it stops being workable. So you're working a genuinely messy compound against a clock, which is exactly the kind of pressure that turns small mistakes into bigger ones. Gloves are not optional. Any surface this stuff touches is coated forever. You can squeegee some of it off with a stick, but there's always a film left behind.
Freshly mixed, it handles like warm marshmallow fluff. It grabs onto anything it touches, and if you ask it nicely with a stick, it'll spread out into an impossibly thin, even layer and just sit there, held by its own surface tension. No matter how thin you spread it, it keeps this strange, almost mechanically-perfect shine, more like polished metal than rubber. And it smells, unmistakably, like old hard-boiled eggs mixed with new tires. Turns out that's a pretty accurate preview of the chemistry. More on that below.
Striping the spars
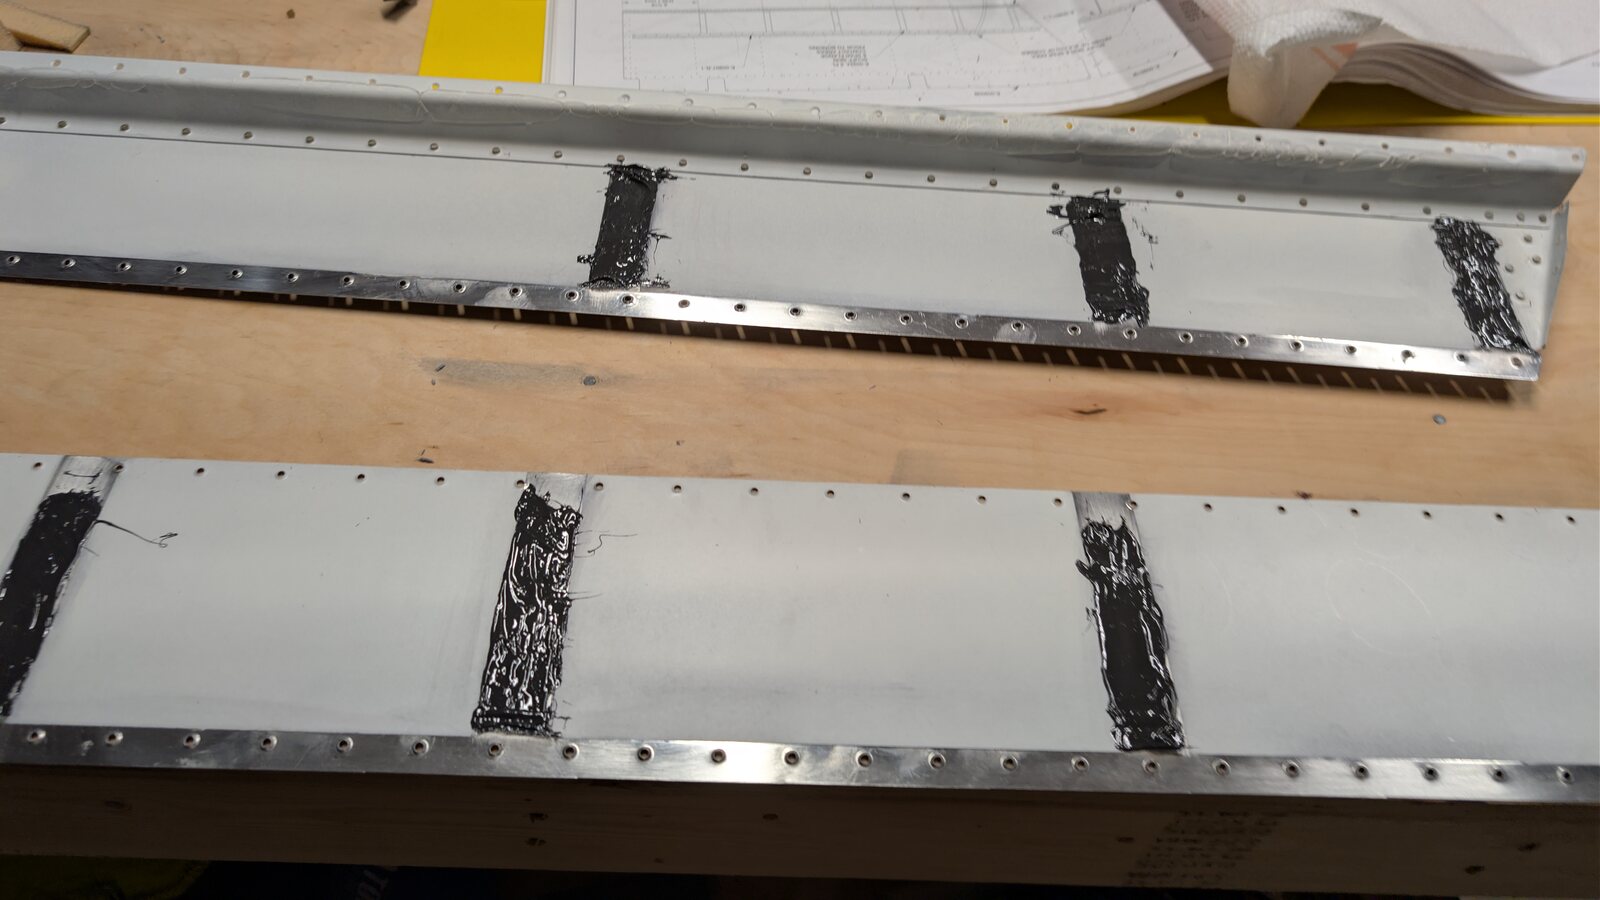 [full size]
The manual doesn't call for a full coat across the whole spar, just a stripe at each rib location, sized to roughly match the rib flange about to land on top of it. Here's both trim tab spars laid out with their stripes done, primer visible everywhere else.
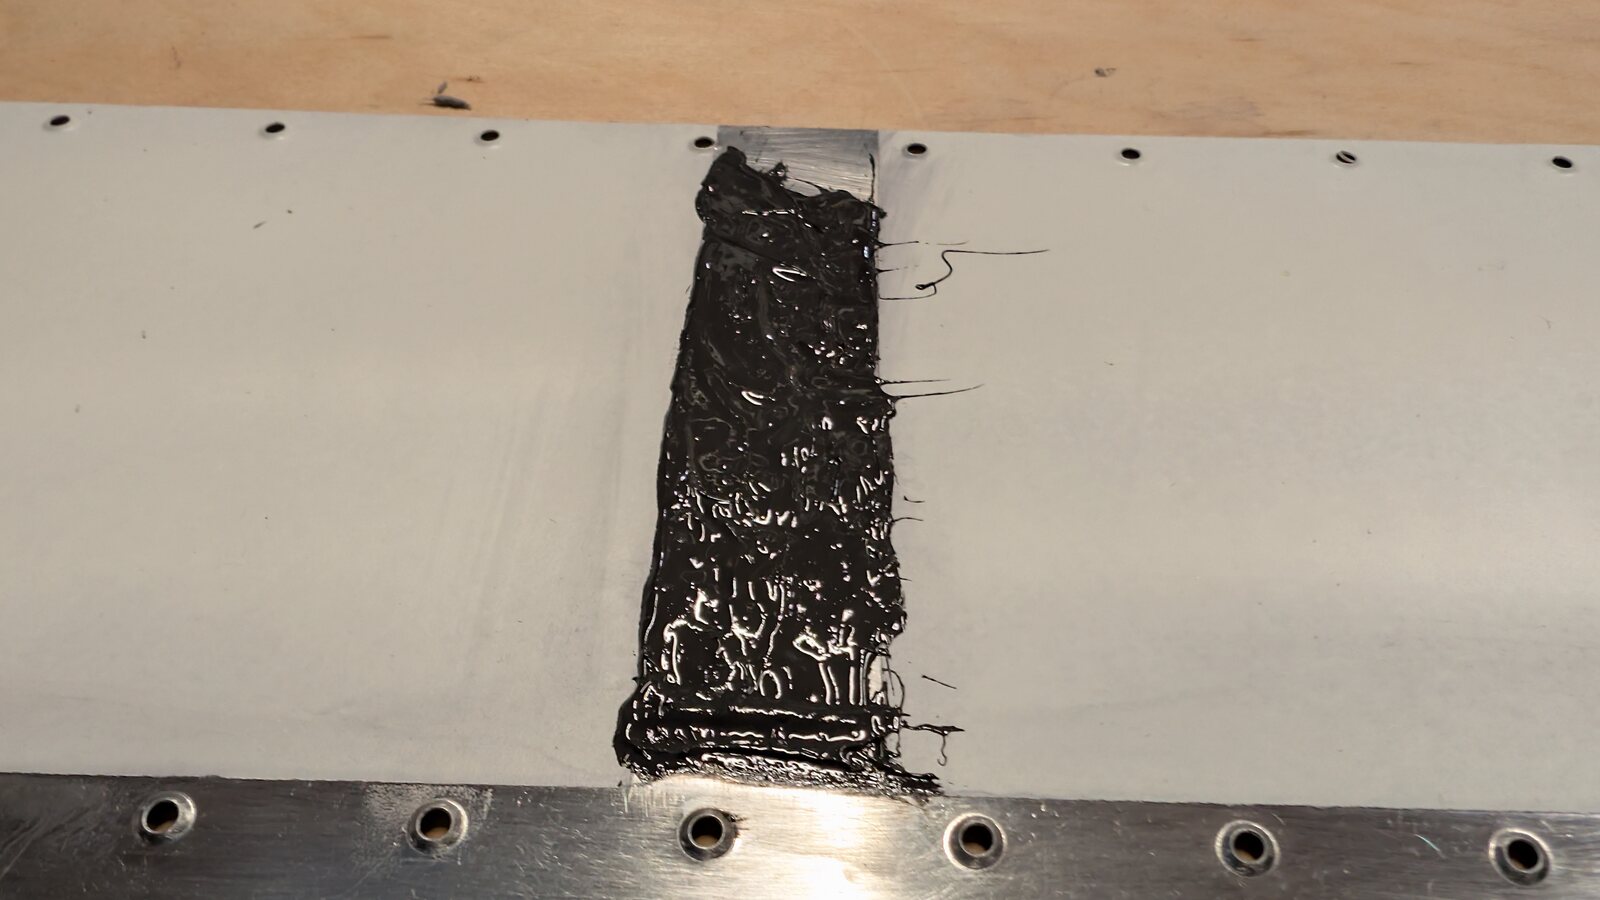 [full size]
A closer look at one stripe. This is the texture I mean: glossy, almost lacquered, with fine trailing strings left over from pulling the stick away.
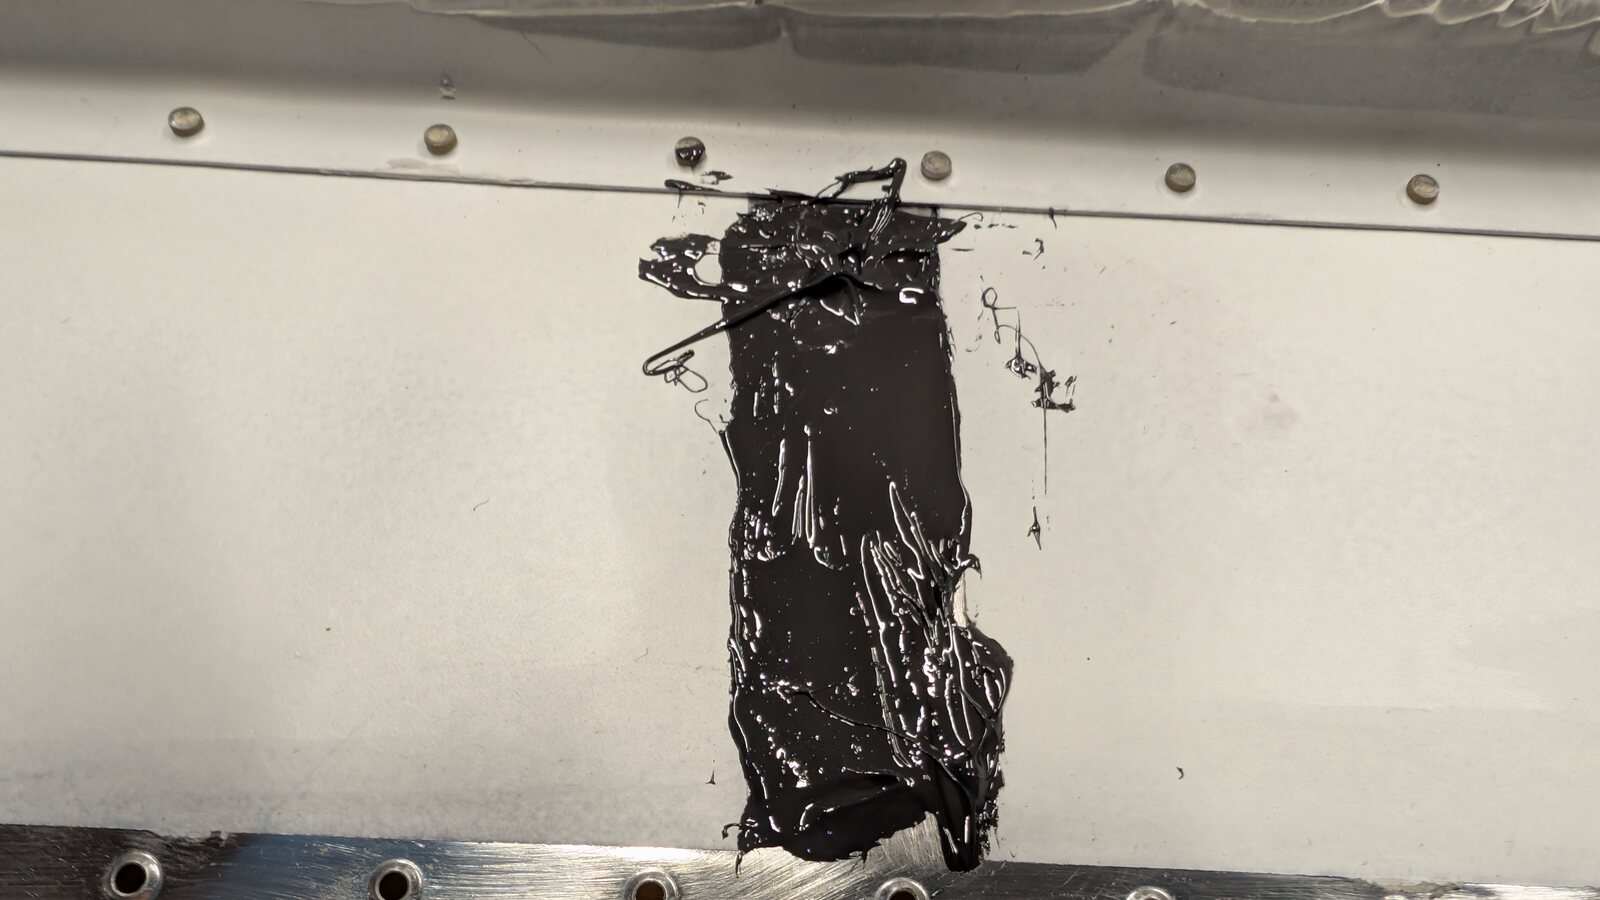 [full size]
Same thing, different rib, same mirror shine. It photographs like there's metal shaving embedded in it. There isn't. That's genuinely just how reflective the surface holds itself, right up until you touch it and it doesn't let go of your glove.
Riveting wet, then weighting it down
With the sealant still wet, the skins get cleco'd on and riveted immediately. It's doing double duty as gap-filler and light adhesive, not just a coating that gets covered up. A little squeeze-out at the rivet lines is expected and normal.
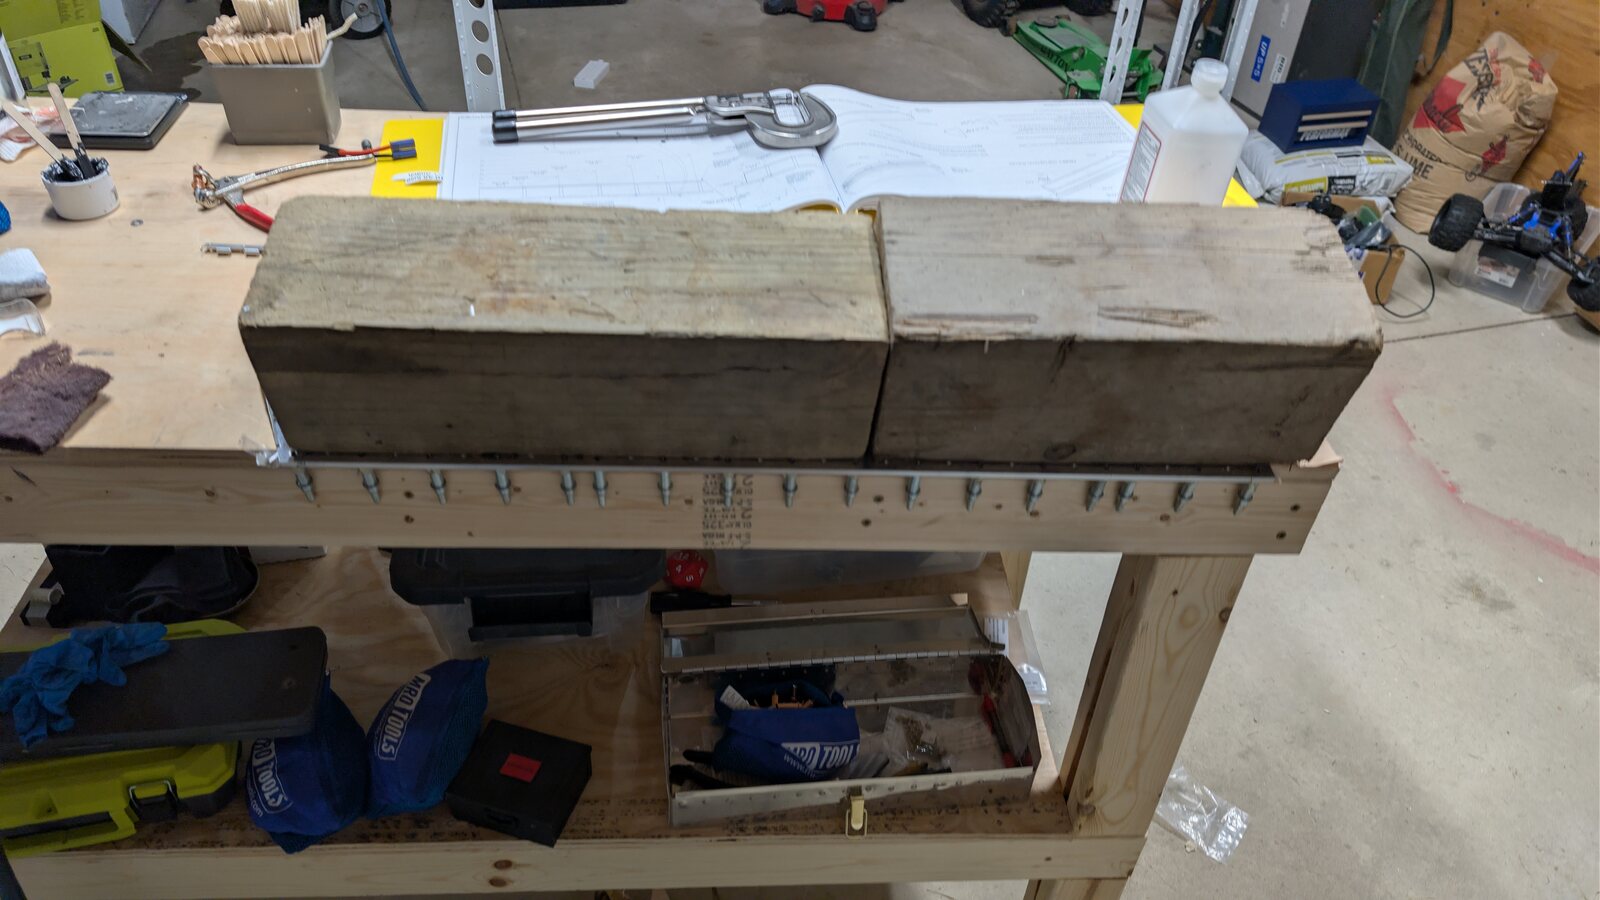 [full size]
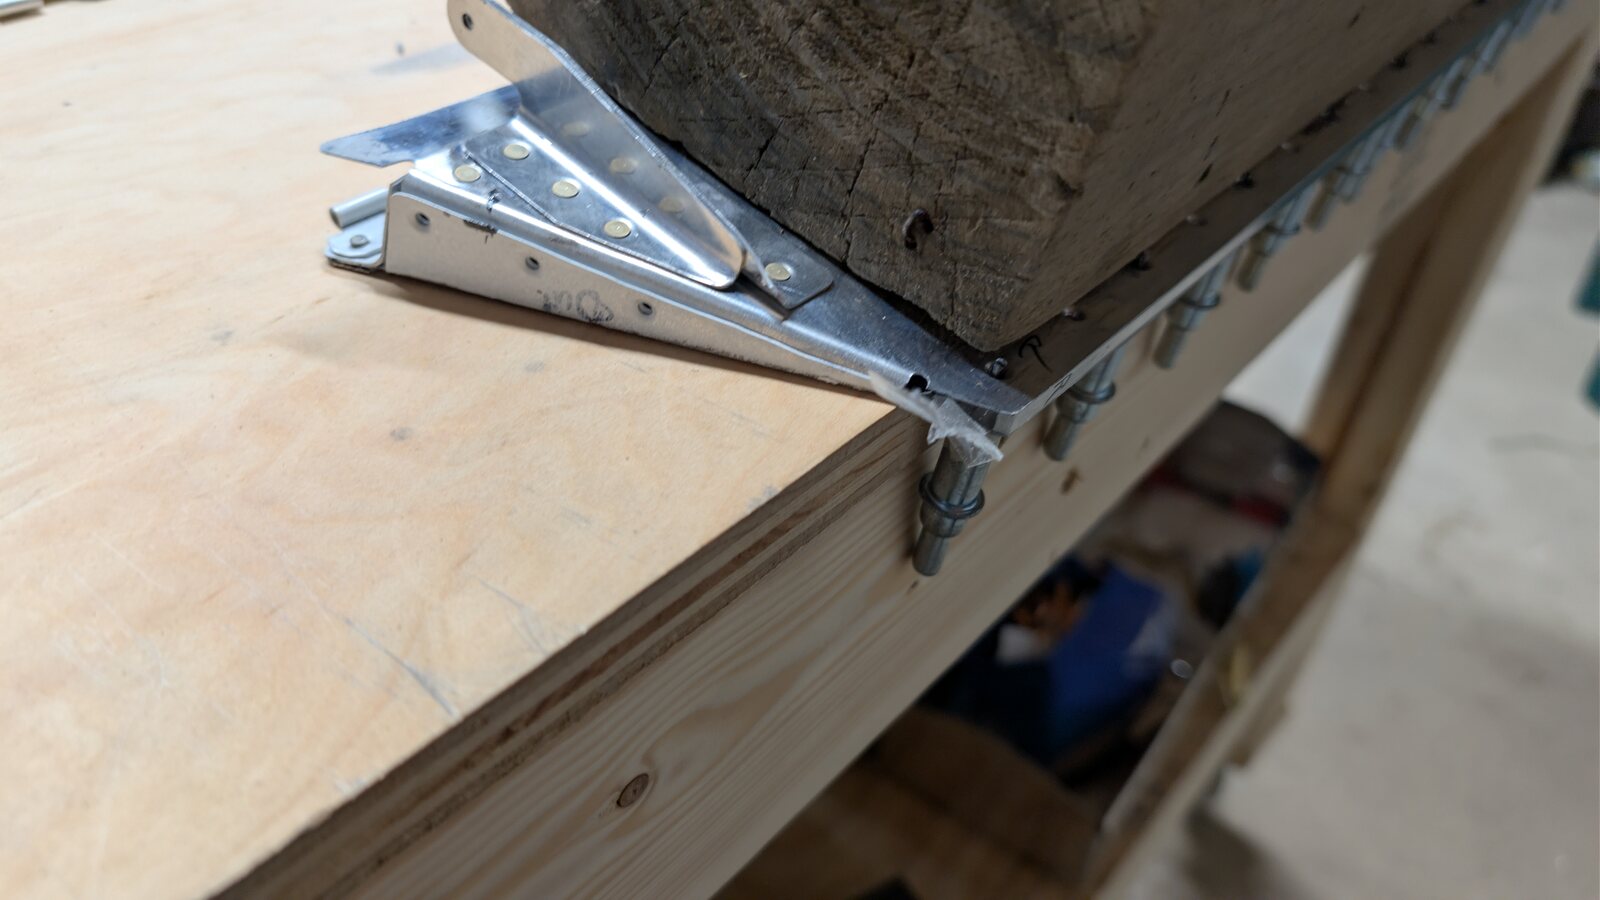
Then, straight from the book: place a weighted board over the assembly and leave it flat while the sealant cures, to guarantee full contact between the two skins the whole time. Those particular blocks of wood are actually my car ramps' cribbing, the same chunks I stack under the jack for oil changes, moonlighting as aircraft clamps for a couple of days.
 [full size]
A closer look at one end, with the trim tab horn bracket cleco'd down under the corner of the block. I mixed and applied the sealant the night of August 3rd and left the blocks in place from the 4th through the 6th. Two full days, exactly what the manual calls for.
How it actually works, and why it's $168 a quart
Part A is a liquid polysulfide polymer: a chain of carbon links strung together with sulfur-sulfur bonds and reactive thiol (sulfur-hydrogen) end groups, loaded with fillers and the carbon black pigment that makes it jet black. Part B is the curing agent, classically a manganese-dioxide-based oxidizer. Its whole job is to grab those thiol ends and stitch the polymer chains together into one continuous, cross-linked rubber network. That's what "curing" actually means here. It isn't solvent evaporating out like paint, it's a real chemical reaction, and it only starts once A and B are touching in the right ratio. Which is exactly why the can insists on blending Part B thoroughly before it ever meets Part A, and exactly why you're racing a thirty-minute clock once it does. Too little curing agent and the reaction never finishes, leaving a soft, permanently tacky mess. Too much, and you push it the other way into something brittle. That rotten-egg smell isn't a coincidence either. Sulfur compounds smell like sulfur compounds, mixed with whatever the plasticizers in the filler package smell like. Hence old hard-boiled eggs and new tires.
The sulfur-rich backbone is also the whole reason this family of rubber is what lines fuel tanks in the first place. Most rubbers and adhesives will swell, soften, or dissolve if they sit in contact with hydrocarbon fuel for years. A polysulfide network holds up far better, staying intact and flexible for the life of the tank instead of degrading and eventually leaking. That flexibility matters again here, even on a joint that never sees a drop of fuel, because an airframe never actually holds still. Rivets work. Skins flex. Temperatures swing. A rubber can absorb all of that indefinitely. A rigid material like JB Weld's epoxy would eventually crack instead.
None of that comes cheap. AMS-S-8802 is an aerospace qualification spec, which means every batch carries traceable lot numbers (the ones printed right on the cans above), plus documented testing and paperwork most hardware-store sealants never touch. The nine-month, refrigeration-recommended shelf life bakes waste directly into the supply chain. It ships as a regulated combustible, hazmat liquid. And the buyer pool is tiny: aircraft manufacturers, MRO shops, and kit builders, none of the volume economics of a tube of bathroom silicone. You're not buying $168 worth of black tar. You're buying a rubber that's certified to sit inside a fuel tank, or laminated permanently between two riveted skins, for the life of the airplane, without ever failing.
And here's the payoff: the trim tab, fully riveted, off the bench and cured. Every bit of that sealant is sealed inside the joint now, where you'll never see it again. Honestly, after all the horror stories, it wasn't nearly as bad as I'd built it up to be in my head. If your kit calls for it, go ahead and try it yourself.
Next up is the rest of the elevator. Which, naturally, means more sealant is coming.