Dimpling- before or after priming?
Hello again! it's been another few days! Since then, I've been getting ready for the final assembly of the Horizontal stabilizer.
For now I'd like to write something else here. Priming vs dimpling first. I'm not going to cover the priming debate. There are advantages to both priming first and dimpling first, and I'd like to present here on what I've found doing both.
Priming First
Priming before you dimple is, without a doubt, the quickest way to process aluminum sheets. This efficiency isn't actually about the painting itself; it's about the mandatory prep work.
Before a single drop of primer touches the metal, you have a strict regime to follow:
-
Initial scuffing (mandatory)
-
Chemical etching and rinsing (optional, but recommended)
-
Isopropyl Alcohol (IPA) wipe-down to remove any lingering residue
If you dimple the metal before doing this prep, the geometry gets highly complicated. Scuffing around pre-existing dimples is incredibly tedious. The sudden rise in the material causes the scuffing pads to skip, meaning you have to manually scuff around every single rivet hole from multiple directions.
To help imagine this, think of dimples as volcanoes, and the scuffing pads as clouds approaching from the horizon. Even though the clouds may be much higher than the top of a volcano, they are still parted as they roll overhead. So too is the scuffing pad parted as it passes over the dimple.
This is a very real concern. Dimples are the most mission-critical portion of any skin; they hold the aircraft's structure in precise alignment via the rivets. If you're going to get corrosion, the absolute worst place to get it is right inside that rivet hole.
For visualization, here is an example of a skin that I primed before I dimpled.
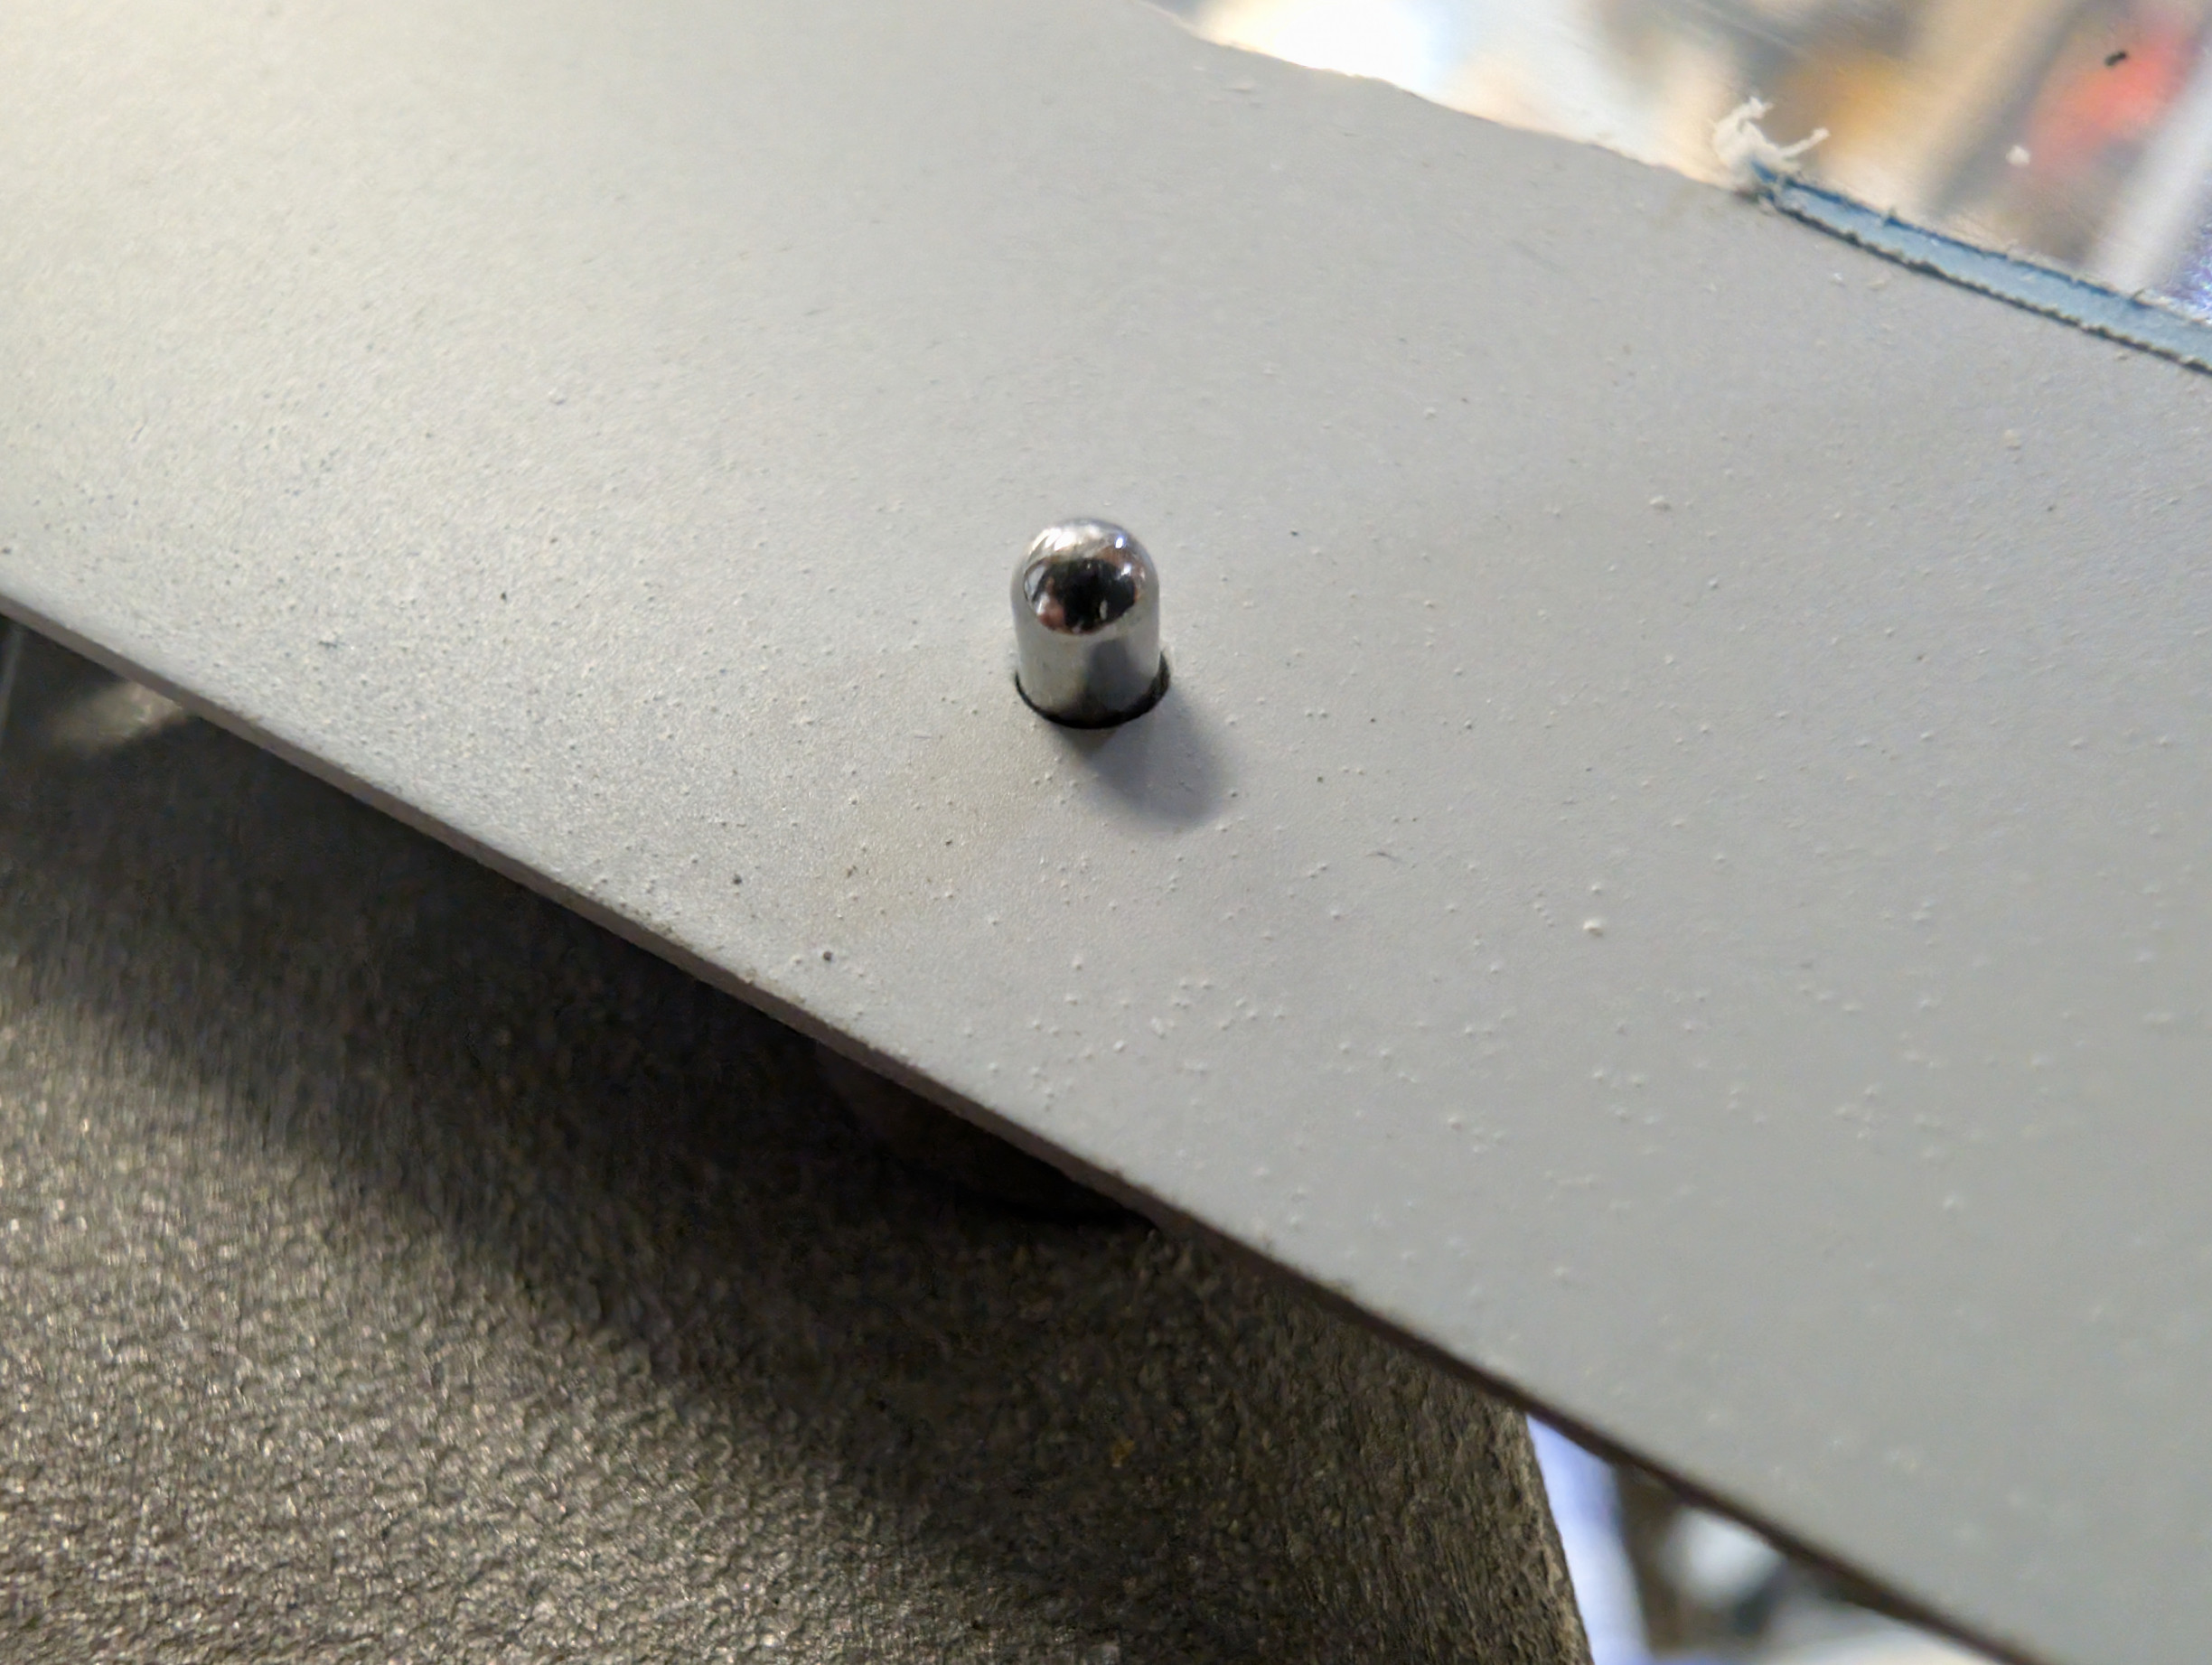 [full size]
and after dimpling:
[full size]
and after dimpling:
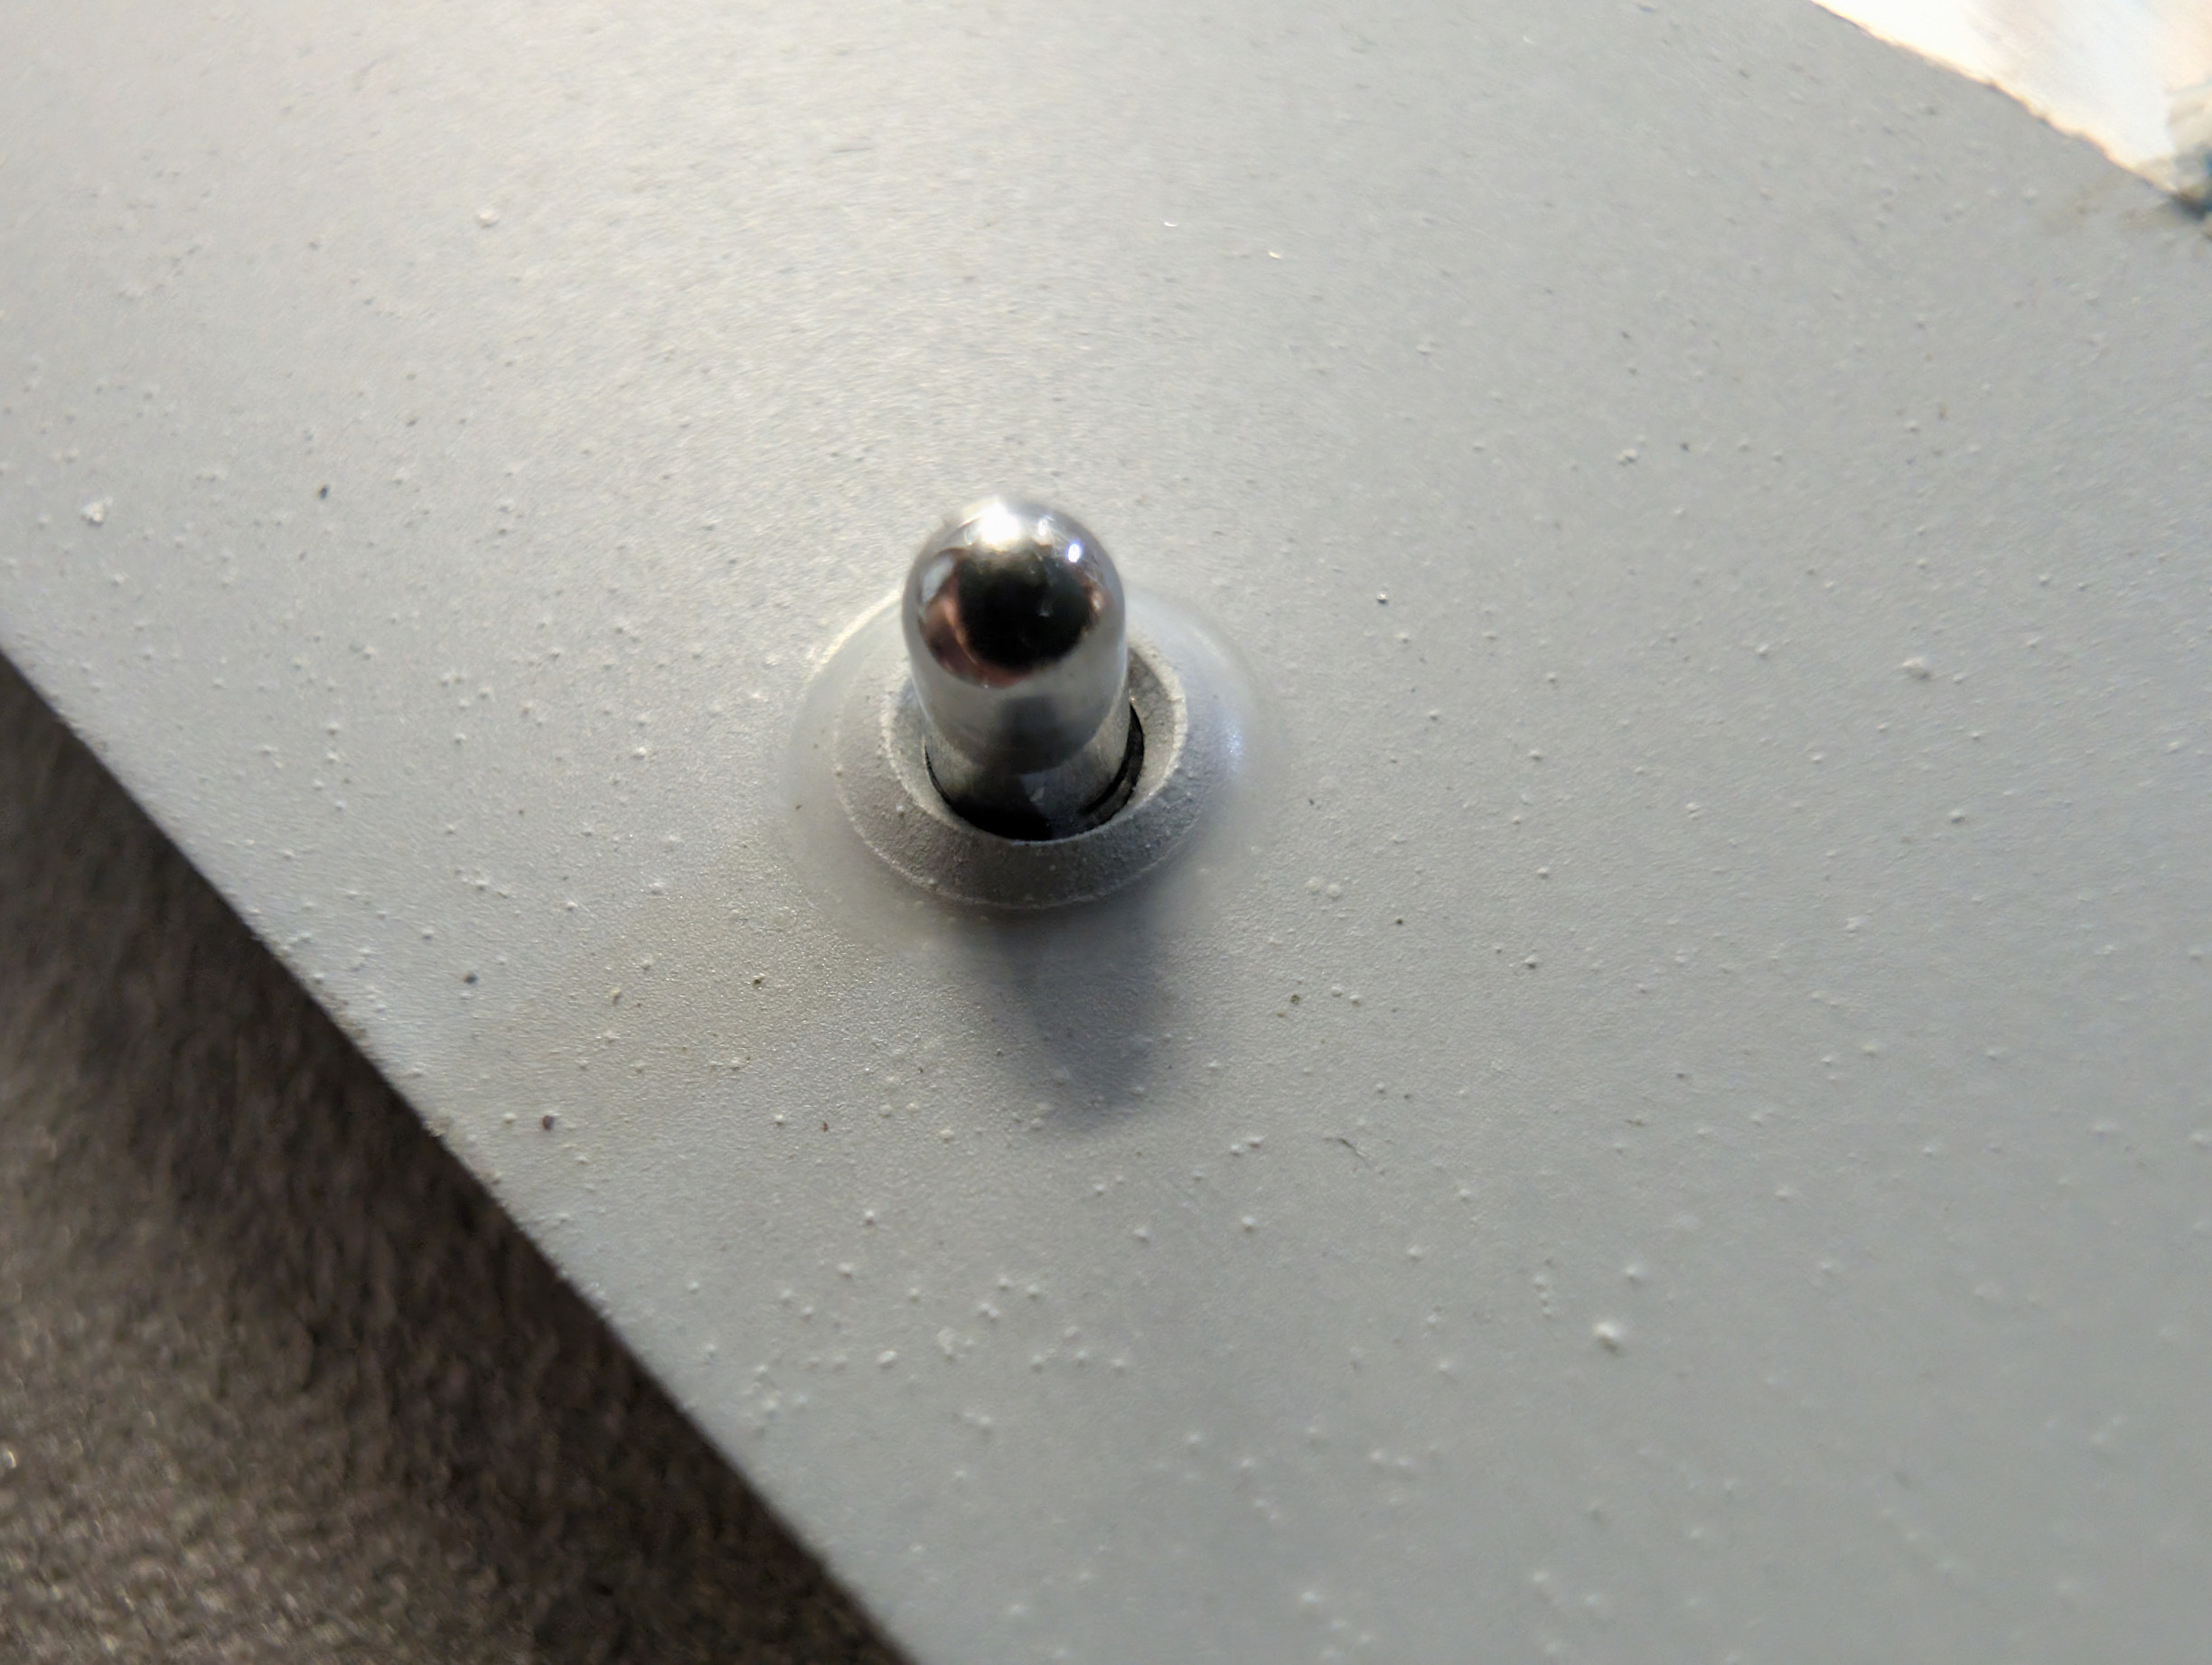 [full size]
This is after a 36 hour curing window has passed. It's quite easy to see that there is no damage to the coating whatsoever after dimpling. I did not do any analysis with a microscope, but I hope to one day, and that will give us a much better understanding of whether the ekoprime mixture is truly flexing as intended, or if it's just cracking on a scale that we cannot see. From the initial results however, I'm happy to say that It's working quite well!
[full size]
This is after a 36 hour curing window has passed. It's quite easy to see that there is no damage to the coating whatsoever after dimpling. I did not do any analysis with a microscope, but I hope to one day, and that will give us a much better understanding of whether the ekoprime mixture is truly flexing as intended, or if it's just cracking on a scale that we cannot see. From the initial results however, I'm happy to say that It's working quite well!
![[full size]](../static/hstab-pin-undimpled.jpg)
![[full size]](../static/hstab-pin-dimpled.jpg)
Dimpling First
So, why would anyone choose to dimple first? While it makes the cleaning and scuffing process a massive headache, it offers a couple of major advantages that keep many builders firmly in this camp.
-
Zero Tooling Marks on Fresh Primer: No matter how careful you are with your C-frame or DRDT-2, dimpling dies exert immense pressure. If your primer isn't 100% cured, or if there's a microscopic speck of debris on your die, you risk marring, flaking, or scraping the fresh primer right off the dimple. Dimpling bare metal removes this risk entirely.
-
Total Corrosion Protection for the Hole: When you dimple a pre-primed hole, the metal stretches. Even if the primer flexes perfectly, the very inner edge of the drilled hole is exposed to high stress. By dimpling first and priming second, your primer acts as a final sealant, completely encapsulating the newly stretched metal, the dimple radius, and the raw inside edge of the hole.
The downside, of course, is that you'll spend hours with a toothbrush or a cut-down Scotch-Brite pad trying to meticulously clean out every single "volcano" before the paint can fly. I find that dimpling first adds about 40% onto the total priming time.
For my build, priming first has been a massive time-saver, and the EkoPrime has proven resilient enough to handle the stress of the dies. However, for highly critical, moisture-prone areas, taking the extra time to dimple first certainly has its merits.
Now that this debate is settled for my stabilizers, it's finally time to cleco everything together and start squeezing rivets. Stay tuned for the final assembly!